Pages

Friday 12 October 2018

Easy Blueberry Crumb Cake


Sometimes it's the simple things in life that have the most impact.  This blueberry crumb cake is a perfect example of this.  I signed up to bring a dessert to an end of year party for my son's preschool last year, and while I had an abundance of ideas, I was short on time.

Thus, I decided to cut some corners and buy a cake mix from the grocery store to save myself some time.  While I normally make everything from scratch, now that I'm a mother of two very busy and energetic boys, I've come to the realisation that my sanity is more important than "from scratch".  

I decided that I would doctor up the cake mix and put my own spin on things.  Instead of the more traditional usages for a box mix such as a layer cake or cupcakes. I decided to make one cake in a 9 inch spring form pan, add blueberries and make a crumb topping to go on top.  In making the recipe, I substituted butter in place of oil, milk instead of water, added some good quality vanilla extract (even though I used a vanilla cake mix), and added a teaspoon of cinnamon.  These substitutions added a true depth of flavour and richness the basic cake mix ingredients don't provide.

The result of this experiment worked out so beautifully, I was seriously impressed.  Not to mention, any second thoughts or guilt for taking the "easy" way by using a box mix went straight out the window.  The cake had the most buttery tender crumb and the blueberries add a pop of tang and sweetness.  Finally, the crumb topping pulled the cake together by adding a slight crispness with a hit of cinnamon deliciousness.  This cake looks like something worthy of the most trendiest of bakeries around.  Just the sight it makes me want to curl up under a blanket with a piece and a cup of tea.


Here is the recipe and how I did it:

Ingredients for cake:

1 Vanilla Cake Mix (I used Betty Crocker French Vanilla)
1/2 cup melted butter
1 cup milk
3 eggs 
1 teaspoon of vanilla extract
1 teaspoon of cinnamon
pinch of salt
2 cups of blueberries (fresh or frozen)

Ingredients for crumb topping:

3/4 cup granulated sugar
1 cup all purpose flour
Pinch of salt
4 oz melted butter (1/2 cup)
1 teaspoon cinnamon

Method for cake mix:

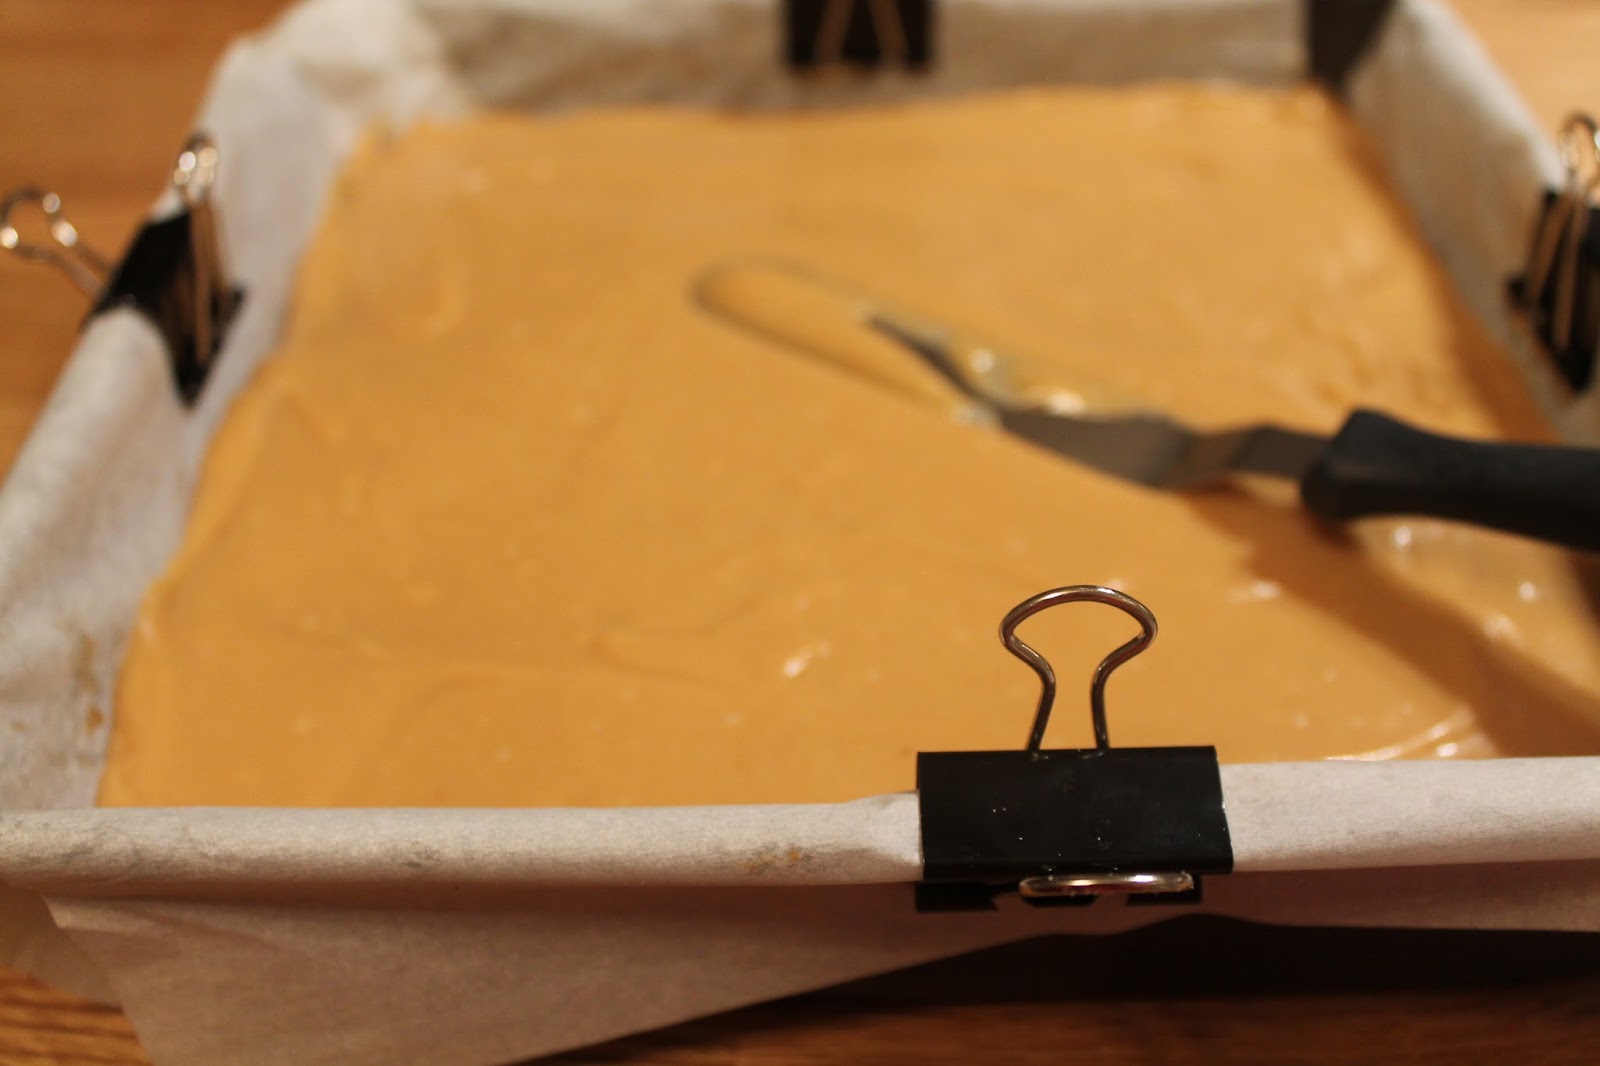
Preheat oven to 350 degrees F.  Grease a 9 inch spring form pan with butter and then add a tablespoon of flour to coat, tapping any excess out into the sink.


Pour contents of cake mix into a medium sized mixing bowl and stir with a whisk to lighten and break up any clumps.  Add the blueberries and toss in the mix so that they are evenly distributed.

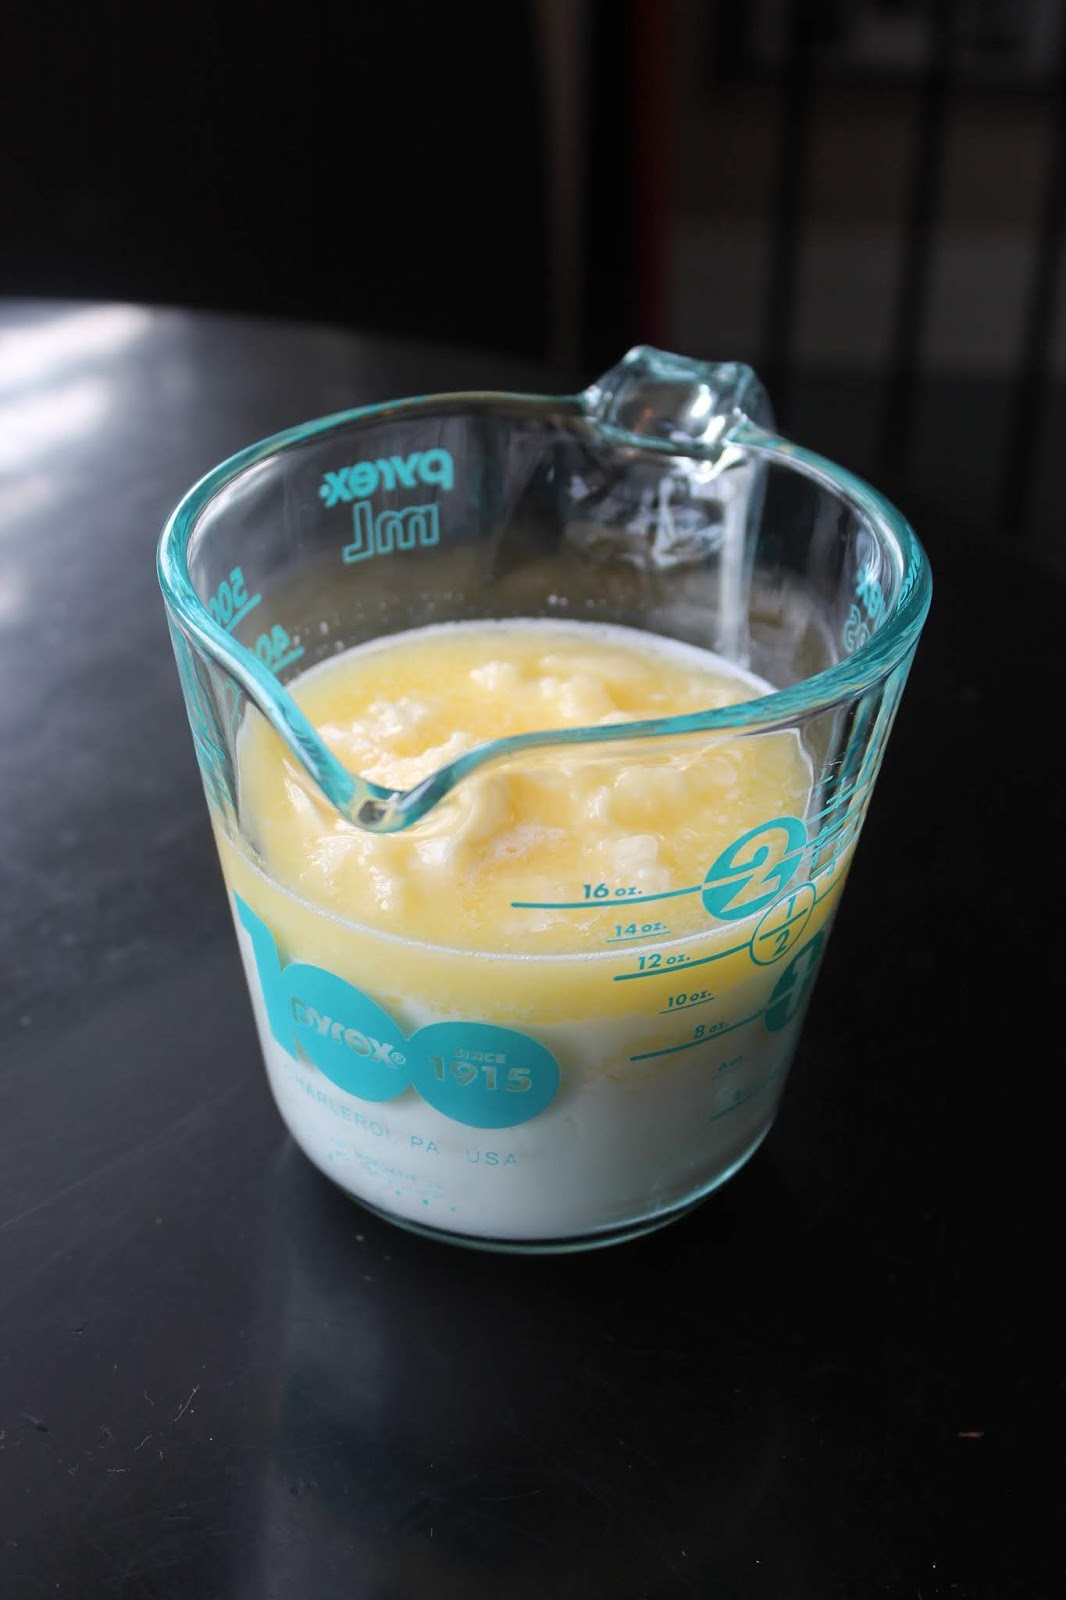
In a 2 cup wet measure cup (I like to used Pyrex), melt 4 ounces or 1/2 cup of butter.  I find it easiest to do this in the microwave.  Add 1 cup of milk to the same wet measuring cup (containing the melted butter) bringing the contents to 1 1/2 cups of melted butter / milk.


Add the butter / milk mixture to the cake mix, eggs, vanilla, cinnamon, and salt to the cake mix and berry's and stir with a rubber spatula until well combined.  Don't over mix.  


Pour the mixture into the prepared pan and set aside while you make the crumb topping.

Method for crumb topping:

Add sugar, flour, cinnamon and salt to a small mixing bowl.  Melt butter in microwave and add to the flour mixture.  Stir with a fork until clumps form that are about the size of a large pea.  


Sprinkle the crumb topping evenly over the cake batter.


Then bake in oven until the crumb is golden and browned, and a cake tester inserted into the middle of the cake comes out clean, about 45 minutes to 1 hour (depending on your oven).

Once cake is fully baked, remove from the oven and let cool in pan for 10 minutes.  Then release the latch on the side of pan and allow to cool for another 25 minutes before removing the spring form ring.  

Dust the top of the cake with a little icing sugar, serve and enjoy!


Saturday 16 December 2017

Apple Pie


Holiday baking season is in full swing, and I love every minute of it.  I remember my mom baking a storm this time of year and the sound of her mix master going at top speed.  For me, it wouldn't be Christmas without homemade sweets. 

I started fiddling around with this apple pie recipe in this fall when apples came into season.  I'd come across a new food trend of making elaborate pie designs using cut outs of dough and wanted to try it.  Some people use cookie cutters to achieve their desired design, and some actually hand cut out their designs with a paring knife, amazing!  I love this new trend and even though it does take some extra time, it appeals to my creative side.  I've done a relatively simple design on this pie using star shaped cookie cutters, but I've seen many stunning designs that get really in depth.  Everything from geometric shapes to layering cut outs of dough over the filling to create a top crust that's super eye catching and impressive looking.  Doing a google search of "fancy pies" will bring up a ton of images. 

Of course, if you don't have the time or inclination to try out some sort of decoration, the pie crust recipe below will create a traditional pie too.  I often use pate brisee a recipe from the book "Pastry" by Michel Roux for most of my pies (here's the recipe from another of my posts).  However, I wanted a dough that would be able to withstand being handled somewhat, wouldn't fall apart  and would hold the shape after baking.  I came across the dough recipe through a pie club that I belong to (and yes, I know how nerdy that sounds).  A fellow food blogger by the name of Karin, came up with a recipe that works so beautifully for decorating, but doesn't compromise on taste.  Check out her blog for the recipe.

As for the filling, I came up with this filling after trying many, many different recipes that pretty much turned out far too watery/runny for my tastes.  I wanted a filling in which the apples are tender but also not too mushy like apple sauce.  As well, I wanted the juices that come out of the apples to thicken up to a nice glossy and relatively thick consistency.  I've figured out that letting the apples macerate in the sugar for an hour or so draws out most of their fluid.  Then I add more thickener than most recipes I've come across call for, which ensures a nice glossy and perfectly thickened sauce.  Something I've learnt about pie making is that it's best to use ratios for pie filling - 25% sugar to fruit and 5.5% thickener to fruit.  Of course this requires having a kitchen scale to figure these ratios out.  Thus, I've found using 5 or 6 regular sized apples with the amount of sugar and thickener I've specified below, works well.  As well, using corn starch as a thickener in pies works great for me, it's easy to find and inexpensive  I know a lot of hard core pie bakers prefer tapioca starch or arrowroot, but I find corn starch works just as good.


Apple Pie Recipe:

For crust, I recommend using this recipe as mentioned above.

Filling:

5 or 6 apples peeled and cored (use any variety you like, I used Royal Gala in my pie)
1/2 cup light brown sugar
1/2 cup granulated white sugar
1 tablespoon of cinnamon
Pinch of salt
1/4 cup of corn starch (sift)

Peel core and chop apples into slices and place in a medium sized mixing bowl.  Add the sugars, cinnamon and salt to the apples and mix, coating the applies with the cinnamon mixture.


Cover with plastic wrap and let sit for 1 to 2 hours and the apples have let off their juices (there should be about 1 to 1.5 cups of liquid).

While the apples are macerating, make the pastry and ready for the pie plate.  This is when you'd also want to make whatever decorations you wish (or not if you going to make a traditional pie crust).  Set aside.


Preheat oven to 350 degrees F.

Add the cornstarch to the apple mixture after it's been sitting (I sift the cornstarch into the mixing bowl of apples to ensure a nice smooth glossy filling after baked).  Mix well and then pour apples into the prepared pie plate and add a few small pieces of butter to help the filling thicken further while baking.  Prepare pie crust as you wish, by decorating with various shapes and cut outs or make pie in the traditional style.


Bake pie in the oven for 35 to 45 minutes or until the crust is lightly browned and the filling is bubbling.  Allow to cool slightly and serve with whipped cream or vanilla ice cream.

Bon Appetit!


Wednesday 28 December 2016

Southern Chocolate Pie


I know the last thing most people think we need after a decadent Holiday season of over-indulging is more chocolate or desserts.  However at this point, I say we need more of both.  There's still New Years Eve coming and if you're planning a get together, this pie is a great dessert to help celebrate New Year.  It's really so easy and simple to prepare and can be made in advance to avoid any stressful post Christmas breakdowns; yet it's still festive enough to bring out at any party. 

This recipe makes me think of the south and summer, something wonderful when the weather is cold outside.  I first heard of such a chocolate pie in the movie "The Help". Viola Davis is one of my favourite actors, so I was quick to go see this movie when it came out.  Of course, while I enjoyed the movie immensely, I was predictably drawn to all the southern cooking that was depicted in the movie.  I left the theatre with a serious craving for fried chicken and chocolate pie (despite the 'secret ingredient' they add to the pie in the movie).

I set out to find a recipe for the pie, or to come up with my own and ended up doing a combination of both.  I started looking up recipes for a chocolate pie and most of what came up was for Chocolate Cream pie.  While this is also lovely, I was looking for a chocolate pie that's baked, chilled and served with a dollop of whipped cream on top.  At the time, it wasn't easy to find.  However, I did come across a recipe in Food & Wine magazine for Minny's Chocolate Pie named for the character in the movie who bakes the pie.  The recipe in Food & Wine was a perfect jumping off point for me, I used it as a general outline and made some changes from there. 

Here's my version of Southern Chocolate Pie:

What you will need:
Medium/large mixing bowl
Wooden spoon
Rubber spatula
Whisk
8 inch pie plate

Pastry:
I always use the same recipe for all of my pies: Pate Brisee from the cookbook "Pastry" by Michel Roux.  This is the best pasty recipe I know, hands down.

*The ingredients are listed in traditional cup measures as well as in metric weight measurements.  If you have a kitchen scale, I highly recommend weighing out your ingredients as it's much more accurate.  As well, I've often used a large pinch of Kosher salt in place of fine sea salt and also used a pinch of regular granulated white sugar instead of superfine sugar, and both substitutions worked well for me.

1 3/4 cups (250g) all purpose flour
2/3 cup (150g) butter, cut into pieces
1 tsp (6g) fine sea salt
Pinch of superfine sugar
1 egg
1 tbsp (15ml) cold milk

Heap the flour on a counter and make a well,  Put the butter, salt, sugar and egg.  Using your fingertips, mix and cream the ingredients together. 

Little by little, draw in the flour, working the dough delicately until it has a grainy texture. 

Add the milk and incorporate gently with your fingertips until the dough begins to hold together. 

Using the palm of your hand, work the dough by pushing it away from you 4 to 5 times until smooth.  Roll it into a ball, divide in half and flatten into a disc.  Wrap each half in plastic wrap and chill until ready to use. 

I find one half of the recipe is sufficient for a pie like this that doesn't have a pastry top like Apple Pie.  Freeze the leftover half for another use.

Chocolate Filling:

1 cup white sugar
1/2 cup dark brown sugar
3 tablespoons of cocoa powder
2 squares of bakers chocolate melted (or 2 tablespoons of any dark chocolate)
4 tablespoons of unsalted butter melted
2 eggs at room temperature
1 can of evaporated milk
1 teaspoon of vanilla extract
1/4 teaspoon of fine salt
Whipped cream for garnish

Preheat oven to 350F.

Roll out dough very thin (I find a thinly rolled out pastry really compliments the filling in this recipe) and place in pie dish, dock the pastry with the tines of a fork.  Place the pie plate with pastry in the freezer while you get on with making the filling.

In a mixing bowl break up the sugars and cocoa powder with the wooden spoon, then whisk the dry ingredients until they are all the same the texture (coarse sugar).  Add the remaining ingredients (minus whipped cream for garnish obviously) and whisk until everything is incorporated and smooth, do not skip this step as it will effect the texture of the finished pie.

Take pie shell out of the freezer and pour the filling in carefully not spilling up onto the sides.  I use a rubber spatula to scrap out every bit of the oozing chocolate filling from the mixing bowl.  Do this on your stove top for easy transport to the oven.  Bake for 30 to 45 minutes (depending on your oven as they all vary), or until the pie is mostly set but the middle jiggles when the pie is moved.  Once finished baking, remove the pie and let sit out on the counter until room temperature.  Then chill in the fridge for at least 2 hours or overnight.  Serve each slice topped with whipped cream. 


Tuesday 20 December 2016

Bruleed Blackstone Eggs Benedict


When the weather gets cold and the holidays are on the horizon, I start to crave Eggs Benedict. There's just something about the warm, rich egg yolk and the salty bacon that goes so beautifully with cold weather.  Growing up, my mom and sister used to make Eggs Benny quite often on Christmas morning.  I was a very picky eater back in those days, so I didn't often partake, but I still have lovely memories of my mom and sister in the kitchen and the wonderful aromas.

As I've grown older, I've come to love Eggs Benedict and make it often for my family.  Not to mention, love to try various versions at restaurants.  There's a wonderful little place in Vancouver, BC called the Sunshine Diner.  My husband and I used to live minutes from the diner, and ate breakfast there quite regularly.  They served many varieties of Eggs Benedict and my favourite was called Blackstone Eggs Benny.  It consists of the usual poached egg on an English muffin, but with the addition of bacon and tomato.

I recently decided to make my own version of this after a morning of shovelling snow off my drive way.  I replaced the English muffin with a nice piece of whole wheat bread and bruleed the Hollandaise sauce after it had been draped on the poached egg.

When I was in culinary school I learnt to make Hollandaise by making a reduction of vinegar, pepper and shallots and then whisking the eggs into that reduction.  As well, any chef will tell you to use clarified butter (pure butter fat).  While I do find the flavour of my culinary school Hollandaise to be really nice.  On this occasion, it was the weekend and I wanted a more relaxed approach.  So, I recalled reading about Nigella Lawson's method for making Hollandaise in her book "How to Eat", so I got out the cookbook and gave it a try.  It turned out beautifully and was much easier than my culinary school recipe.  I made a couple of changes to the original Nigella recipe though.  I didn't use quite as much butter and whisked in a little bit of hot water because I found the sauce got a little too thick for my liking.  

Making Eggs Benedict is a little bit of a balancing act and poaching eggs can be intimidating. However, once you get the feel for it and do it successfully, it becomes a joy to make and not stressful at all.

I might just make this again for breakfast on Christmas morning with my family.

I recommend reading this recipe through before making.

Blackstone Eggs Benedict

What you will need:
2 medium sized pots
Slotted spoon or spider
Paper towel
Spare plate or shallow bowl lined with paper towel
4 ramekins
1 wire cooling rack
1 cookie sheet
Aluminium foil
1 metal or glass heat proof bowl
Whisk

*The ingredients listed below are for two people having 1 slice of bread and two eggs.  However you  could adjust the ingredients to account for more people if needed, or do 1 slice of toast with 1 egg on  it etc.


Ingredients:
2 slices of whole wheat bread (one slice per person)
4 rashers of bacon
1 tomato sliced (you'll need 4 slices)
4 eggs
Vinegar
Salt
Pepper
Butter for spreading on toast

Ingredients for Hollandaise Sauce:
3 egg yolks
1/3 cup butter
1 lemon
few drops of hot water

Preparation:
This list of preparation might seem redundant because many of these steps are also listed in the method for poaching eggs and making Hollandaise.  However, I feel it's important with a recipe like this to be prepared before you get going so you don't end up running around like a crazy person during the cooking.  Feel free to follow or ignore my recommended prep work guideline or come up with your own.  

I begin with setting my oven to 350F and placing a wire rack on top of a cookie sheet (which I've lined with aluminium foil to catch the bacon grease and for easy clean-up).  I then place the four rashers of bacon onto the rack and into in the oven to cook.  If you've never made bacon this way, I highly recommend giving it a try.  The bacon stays nice a flat on the rack as it cooks (instead of curling up as it does when fried in a skillet or pan) and comes out crisp all the way through.  Not to mention, it's out of your way leaving more space on your cook top.  


While the bacon is cooking in the oven, I assemble the remaining supplies and ingredients I'll need.  I fill one of my pots with water for poaching the eggs.  I like to have the water about 3 inches deep and add a splash of vinegar and a good pinch of salt (this helps the white of the eggs to coagulate and poach correctly into a nice oval shape).  You may be tempted to skip the vinegar and salt, but please don't, it really does make a difference.  Start heating the poaching water to a gentle simmer (but never let the water boil).  While you're at it, might as well fill the second pot with some water for the double boiler you'll use to cook the Hollandaise and set aside for later.

While the poaching water is heating, I crack my four eggs into the ramekins (4 ramekins, 1 egg in each) so I'm prepared for when I start poaching the eggs. I never crack the eggs directly into the poaching water, I get a much more consistent result when I gently slip the egg from the ramekin into the poaching water.  Set the ramekins aside until needed.

Then I slice my tomato up so I have 4 slices to go under each poached egg and pop my bread into the toaster so that all I have to do is start toasting closer to when everything is done.  You could also separate the three eggs needed for the Hollandaise in advance too, placing the yolks in the metal or glass bowl and set aside.  Lastly, I line a plate with a few sheets of paper towel (for the poached eggs to drain on).

I find it best to make the Hollanadaise first and then poach the eggs.  The Hollandaise can sit for a few minutes without splitting (contrary to what a lot of people think).  If the sauce over thickens just add a little hot water.

Hollandaise Method:
Fill the second pot with a few inches of water (you may have done this already if followed my recommended prep) and bring to the boil on stove.  While this is happening, separate three eggs placing the yolks in the metal bowl and reserve the whites for another use.

Cut the 1/3 cup of butter into cubes and set next to the stove for easy access.


Once the water in the pot is boiling, turn the heat down to low and place your metal or glass bowl over the pot (this is called a bain marie or a double boiler).  Then start whisking the egg yolks until they've started to thicken slightly.  Then start adding a cube of butter at a time, whisking it in until it melts, add another cube, whisk again until melted, and so on.

I find (and was also taught in culinary school) it's best to remove the metal bowl from the stove and whisk the mixture for a minute or two off the heat. I do this every few cubes of butter to ensure the sauce doesn't over heat and split.  As well, if you're finding the mixture is thickening too much (almost becoming a paste as opposed to a sauce) then add a few drops of the hot water from the simmering pot or bain marie (below).  Once all the butter is added in, spritz a little bit of lemon juice, give the mixture another good whisking, and set aside in a warm place while you poach the eggs. Whisk it every so often while poaching the eggs to keep if from getting a skin on top.  Once again, if the sauce thickens while it's sitting, whisk in a little hot water (I know I sound like a broken record here, but it really does work well).  


Egg Poaching Method:
Line a plate with some paper towel (for the finished poached eggs to drain on).  Also, it's not a bad idea to have a slotted spoon, a wooden spoon and a whisk on hand.


Place the pot (you filled earlier with water, a splash of vinegar and pinch of salt) on to simmer but don't let the water boil.

Once the water is barely simmering, start by swirling the water around in the pot (the whisk works great for this) so you have a little vortex in the middle of the poaching water to drop your first egg into.  Now you need to work rather quickly and get the remaining eggs into the water while it's still whirling.  If needed, use the wooden spoon to keep the water gently swirling around the pot.  Once all the eggs are in the water, keep gently stirring the water (with the wooden spoon) while the eggs cook. It's important to keep the eggs continuously swirling.


At this point, the main objective is to keep the eggs from settling on the bottom but also not damaging them with the wooden spoon. Nothing worse than the yolk bursting into the water...  As well, this is where the vinegar and salt in the poaching water comes in handy and keeps the eggs from falling apart and turning into poached scrambled eggs like this:

Not pretty...


If you end up with an egg bursting, use the slotted spoon to remove it and just add a new egg. However, if all of your eggs don't hold a nice oval ball shape and turn into poached scrambled eggs, the best thing to do is dump everything and start again.  

When I was learning to poach eggs in culinary school, the chefs instructed us to take the eggs out of the poaching water as soon as they're opaque (the French notoriously like their eggs very runny). Personally, I leave mine in a tad longer as I like the white to be set and yolk oozing. However, you can cook the eggs to any doneness you like.  Some people recommend cooking the eggs for a very specific amount of time for a particular set .  However, I'm hesitant to provide cooking times for poached eggs - it so varies on how deep and hot your water is exactly.  As well, every make/model of stove cooks a little differently (are you cooking on a gas stove or ceramic flat top? etc.). Thus, I feel the best way to test the eggs for doneness is to gently lift each egg out using a slotted spoon and very carefully jiggle it.  If each egg is still very jiggly and almost flabby, then I put it back in for a little longer.  If it has a wobbly jiggle that's a little firmer, that's when I take them out for my preference. Finally, if it barely jiggles or not at all, then it's hard poached.

Once all of your eggs are done to your liking, using the slotted spoon, lift each one out and onto the prepared plate with paper towel on it to drain.


Assembly:
By this point the bacon is most likely nicely crisp (if not the eggs will stay warm for a good 5 to 7 minutes).  Remove the tray from the oven and carefully pat the bacon with paper towel to remove excess grease from the tops.  I would also toast and butter your bread at this point.


Set your oven to broil. Place your oven rack about 6 inches below the broiler.

Place the slices of bread on the rack and cookie sheet combo used for cooking the bacon earlier (why dirty up another cookie sheet?)

Place a few pieces of bacon on each piece of bread (I usually break the pieces in half) and any left over can be a cooks treat or extra on the plates.  Then place two slices of tomato on top of the bacon for each poached egg to sit on.  Once the eggs are in place, give your Hollandaise a really good final whisking and add a little hot water if the sauce is too thick from sitting.


Then spoon a generous amount of Hollandaise over all the eggs (it's okay if some falls off and down onto the aluminium foil below, that's what it's there for).


Place the tray under the broiler and let the Hollanadaise on top of the eggs become slightly browned or bruleed.  Remove the tray from the oven and gently lift each Benedict off the tray and onto plates.

Sprinkle some salt and pepper over top and serve with whatever accompaniments you like.

Bon Appetit!


Tuesday 13 December 2016

Millionaire Shortbread


Now that the holidays are in full swing, I've been well into my annual baking frenzy.  Every year I usually try one or two new ideas in the hopes of adding a gem of a recipe into my seasonal baking repertoire. This year, I decided to make my own version of Millionaire Shortbread.  If you haven't heard of these squares before, they're a wonderful triple layer dessert bar with a base layer of buttery shortbread, a second layer of chewy caramel and a final layer of melted chocolate swirled on top. Essentially, this is the closest you'll get to a homemade Twix chocolate bar.  In the words of Ina Garten; "how could that be a bad thing?".

When testing this recipe, I decided to add some whole wheat flour to my shortbread base.  It adds a slight nuttiness and I wanted a little hint of graham cracker type flavour to my shortbread, and graham crackers are typically made with whole wheat flour. Obviously, this is not traditional, but no one's going to call the shortbread police (well... at least I don't think so...)  Either way, if you wanted to use all white flour, that would work just fine.

When researching how to make Millionaire Shortbread Bars, almost every recipe I came across used an entire can of sweetened condensed milk.  I came across one recipe in which the cook made a caramel sauce that was cooked to the soft ball stage to ensure it had the requisite firmness.  While I found this method had great flavour and colour, the caramel was just a little too tough and stretchy (not usually a problem for me).  When I bit into the bars, the shortbread would crumble and separate from the caramel layer. It ended up with caramel being the dominant flavour instead of all three layers melding together in one perfect bite.  While I wanted the layers to be distinct, I also wanted them to be cohesive and not make a mess when eaten.  Ultimately, I found that you really need the sweetened condensed milk to create the perfect caramel with the right consistency for this recipe. When you combine the condensed milk and the butter, this isn't a low calorie recipe.  However, it's a once a year treat, so I'd rather get the caramel right rather than worry about the fat content.

I cooked the caramel longer than most recipes I came across to ensure a nice deep colour and flavour. I found as long as I whisked constantly, the caramel didn't burn or stick to the bottom of the pan.  I will concede, this step takes a little time and attention, but it's well worth it for the end result.  In my opinion, too pale a caramel falls in with an over cooked fried egg or flabby chicken skin.   

For the final chocolate layer, I decided to use dark chocolate as opposed to milk or a combination of both.  I personally like the contrast of flavours between the rich caramel and slightly bitter chocolate. I tend to favour recipes with complex yet balanced flavours, especially in desserts, so as to not make the final product too sweet.  However, if you really like the idea of milk chocolate, go ahead and use it instead. The bars will end up more true to the flavour of commercial Twix bars, not to mention; if you're cooking for kids, they usually prefer milk chocolate.


I must say, I'm really glad I tinkered with making these squares.  I'm thrilled to have another option to add to my holiday baking or to bring out for a special occasion.  Here's my version:


Millionaire Shortbread Recipe:

What you will need: 
-9x9 square baking tin
-Parchment paper 
-Small metal offset spatula (though a rubber spatula will work too)
-Whisk
-Rubber Spatula(s)
-Heat proof glass or metal bowl
-Medium sized saucepan
-Kitchen scale for measuring the chocolate (which will provide a more accurate measurement).  I've  added measurement in cups as well.

Preheat oven to 350F.

Shortbread Ingredients (first layer):
3/4 cup salted butter, at room temperature
1/2 cup granulated sugar
1 teaspoon of pure vanilla extract
3/4 cup white all purpose flour
1/4 whole wheat flour
1 tablespoon of cornstarch
Small pinch of salt (optional)

Shortbread Method:
Line 9x9 baking tin with parchment paper so that it goes up over the sides of the tin.  This way, it makes lifting the finished squares out of the tin much easier later.

Cream the butter with granulated sugar in a medium sized mixing bowl or in a stand mixer using the paddle attachment.  Add vanilla and mix until combined and the dough is starting to form into a ball.

Add both flours, cornstarch and pinch of salt (no need to sift dry ingredients in this recipe) and mix until combined.  The reason I say the salt is optional is because I opted to use salted butter for this recipe.  I found the shortbread still needs a hint more salt since it's being paired with a sweet caramel and chocolate.  I'm normally a stickler for using unsalted butter when baking, however I do find the salted butter somehow creates a flakier texture to the shortbread.  If you prefer to use unsalted butter, please just make sure to add 1 teaspoon of salt (kosher or sea salt, do not use fine table salt please) to the recipe in place of the small pinch listed above.

Add the dough to the prepared tin and spread out to the corners in an even layer (using a small metal offset spatula and/or your fingers).  Dock the dough with the tines of a fork and chill in the fridge for 1 hour.  I find this is a necessary step to ensure the shortbread doesn't bubble and cook unevenly.  If you skip this step and put the shortbread straight into the oven, it won't be a disaster.  However, the layers may not end up looking as sharp once the recipe is complete and cut into squares.


Bake for 12 to 15 minutes (depending on your oven) or until slightly golden and cooked in the middle.  I also found half way through cooking, quickly taking the tin out of the oven and docking the shortbread once again with the tines of a fork, helped to ensure a super even bake.


Let the cooked shortbread rest at room temperature while you get on with the caramel layer.

Caramel Ingredients (second layer):
1 cup unsalted butter
1 can of sweetened condensed milk
1/2 cup brown sugar
2 tablespoons of golden syrup
Pinch of salt
1 teaspoon pure vanilla extract

Caramel Method:
Melt the butter in a medium sized saucepan, then add the remaining ingredients except the salt and vanilla.

Bring the mixture to a simmer, turn down the heat slightly and then whisk, whisk, whisk.  It's not necessary to whisk so hard that you give yourself a heart attack.  However, you do need to whisk constantly until the caramel has thickened quite a bit (when you lift the whisk out of the pan, a large amount of the caramel will cling to the whisk and then fall off in one large clump).  This will take probably around 7 to 10 minutes of whisking depending on your stove.  This step isn't difficult or stressful, just a takes little time and attention.

Once the caramel has properly thickened and developed a nice caramel colour, add the vanilla and salt and whisk for a few seconds to combine (if you add these ingredients to early their flavour will be lost while the caramel cooks).  Then pour the caramel over top of the already baked shortbread.  You will need to have a rubber spatula on hand to scrape the caramel off the sides and bottom of the saucepan.  Smooth the mixture out to all the corners and spread into a nice even layer (I use the small offset spatula for this too). Then place the tin in the fridge while you melt the chocolate for the final layer.


Chocolate Ingredients (final layer):
4 1/2 oz, 130 grams or 1/2 cup (use your preferred method of measuring) of chocolate
1 tablespoon of un-salted butter
Sea salt for sprinkling on top (optional)

Chocolate Method:
Chop the chocolate into small chunks and place in heat proof bowl.  Place the heatproof bowl over a saucepan with barely simmering water inside.  Let the chocolate gently melt, mixing with a rubber spatula occasionally.  Alternatively, place the heat proof bowl of chopped chocolate in the microwave and heat in 30 second intervals stirring each time, until melted.  Add the butter and stir until melted and combined.  The butter will ensure the chocolate is slightly softened, so it doesn't crack apart when the squares are bitten into.  Pour the melted chocolate over the caramel layer and smooth and swirl the chocolate to completely cover the caramel.


Sprinkle some sea salt over top the chocolate and place the tin back in the fridge to completely set up; a few hours or overnight.  You could leave off the sea salt garnish if you wish, but I absolutely love the hint of saltiness with caramel.  Slice into squares and your in business!


Happy Holiday baking!


Monday 18 July 2016

Bright and Fresh Lime Squares


I love making this recipe in the summer, there's something so satisfying about having a sharp and tangy dessert to cool your palate on a hot day.  While I enjoy warm pies or richly decadent desserts in summer; when the heat hits, I'm drawn to cool, sharp and crisp flavours.  As well as being a summer treat, these squares are wonderful anytime of the year and in any season. In fact, these are a great addition to a Holiday baking repertoire as it's something a little different, bright and tangy.

When I first started testing this recipe which I've adapted from Ree Drummond's recipe for Key Lime Pie, I was bound and determined to find and use Key Limes.  After quite a search of local specialty stores and driving about 45 minutes from my house, I finally found a store that had Key Limes, I was stoked.  Unfortunately, my excitement didn't last long as they were difficult to work with and not worth all that effort in my opinion...  Key Limes are smaller than a traditional lime and I found extracting juice from them almost impossible.  In all fairness, I've come across regular limes that were bone dry too, but usually that's just one in a bunch. Every single Key Lime I purchased (at a high cost I might add) was dry and yielded almost no liquid. As well, the zest of the Key Limes was quite bitter in comparison to regular limes.  Almost as if a Lime and a Grapefruit had joined forces. To some, this might sound wonderful, but not really to my taste.  At the end of the day, as much as I wanted to love Key Limes, I just found the cost and effort didn't match the affordability, availability and flavour of regular limes.

Key Lime search aside, this recipe is very easy and doesn't involve anything fancy - just mixing and pouring.  In testing the recipe, I found the acidity of the limes needed something creamy to balance out the flavours.  So, I decided to make a white chocolate ganache that gets spread out over the top of the baked squares.  Not only does it add just the right balance of creaminess to tartness, it also creates a smooth as glass finish on the squares that looks stunning.  Obviously, if this doesn't suit your tastes and preferences, it could be left off.  A layer of whipping cream or a dollop on each square would be lovely looking and tasting too.

Key Lime Squares Recipe:

Crust:
18 Graham Crackers
1/2 cup of butter melted (in the microwave is fine)
1/4 cup plain granulated sugar

Filling:
1 can of sweetened condensed milk
Zest and juice of three limes
2 egg yolks

Ganache Topping:
1x 100g bar of good quality White Chocolate like Lindt, chopped or broken into pieces
90ml's or a generous 1/3 cup of heavy whipping cream
Splash of vanilla extract or vanilla bean paste

Method;

Preheat oven to 350F and line a 8 x 8 square baking tin with some parchment paper.

In a food processor, combine the graham crackers, melted butter and sugar.  Blitz until blended and no large chunks of graham cracker remain.  Pour mixture into the prepared tin and press into a flat layer on the bottom.  Bake in the oven for about 5 to 7 minutes or until lightly golden and fragrant.  Allow to cool slightly while making the filling.

In a medium sized mixing bowl, whisk together the sweetened condensed milk, zest and juice from the limes, and egg yolks until smooth and combined.  Then pour filling into tin and on top of graham cracker crust.  Bake in the oven for 10 to 15 minutes or until the filling is mostly set with a little jiggle remaining in the centre when the pan is gently shaken back and forth.  Set aside to cool a bit while you make the ganache.

In a small saucepan, scald the cream (heat to just below a boil), the cream should make a loud spattering noise when you gently swirl in the saucepan.  Place the chopped or broken up pieces of chocolate in a small heat proof bowl.  Then pour the heated cream over the chocolate and let sit for 1 to 2 minutes.  Then, gently stir using a rubber spatula until smooth and all the chocolate has melted into the cream.  Add the splash of vanilla now (if you added it earlier most of the vanilla flavour would evaporate).  Then pour over the baked filling and crust (use an offset spatula to spread out evenly if needed) and place in the fridge to cool completely and set up (about 4 -6 hours).  Then cut into squares using a sharp knife and wiping the blade after each cut.

Happy summer!


Friday 5 February 2016

Mini raspberry and white chocolate mouse cheesecakes


Lately I've been on what I can only describe as a mini cheesecake bender - any excuse (or not) to make them and off I go.  Initially, I was drawn to making this because they look like an adorable cheesecake version of a cupcake.   As well, I was asked to bring a dessert to a baby shower, and thought this would be a lot easier than having to slice pieces of cheesecake for everyone. The added benefit of no washing up a serving plate, was the cherry on top.  Now I make these in lots of different flavours ranging from peanut butter cup, chocolate chip all the way to fruity versions like Meyer lemon and honey.  They've all worked out really well and each time I successfully try a new flavour, it just spurns me on to come up with another new variety.  


In this recipe, I've made a white chocolate raspberry version which is a great dessert for a shower (baby girl or wedding).  Being that winter isn't exactly the best time for using fresh raspberries, I use raspberry jelly or jam.  It adds the right amount of raspberry flavour, a nice pleasant sweetness, and little bit of tartness. However, if raspberries are in season, you could add about 1 cup of mashed raspberries to the recipe in place of the jam.  Although, I would advise adding an additional 2 tablespoons of sugar to the recipe, otherwise the cheesecake will bake up a little too tart. As well, you may have to bake for 5 or so minutes longer than I've advised below.  This is because fresh raspberries will add more water to the cheesecake batter, slowing the cooking time a little.

When I initially made this recipe, I went to the effort of making white chocolate mousse to pipe on top of the cheesecakes, since it was a celebration. However, this step could easily be left out and replaced with some whipped cream or a little white chocolate ganache drizzled over the top.  As well, I used ground up Digestive Biscuits for the base as I find the flavour really compliments the raspberry and white chocolate.  It practically goes without saying, but using ground up Graham Crackers works just as nicely

Here's my recipe:

Base:
13 digestive biscuits
1/4 cup unsalted butter, melted
2 tablespoons of white granulated sugar or caster sugar
Pinch of salt

Cheesecake Filling:
2 x 8oz packages of cream cheese
1/4 cup sour cream
1/4 cup plain yogurt
2 teaspoons of vanilla
1/4 cup granulated sugar or caster sugar
1/4 raspberry seedless jam or jelly
2 eggs
2 tablespoons flour
Pinch of salt

White Chocolate Mousse:
100g package of white chocolate (I use Lindt)
237ml carton of whipping cream
Dash of vanilla

Preheat oven to 350 degrees F.  Line a 12 cup muffin tin with cupcake or muffin papers.

Method for the cheesecake base:
Blitz digestive cookies in a food processor until finely ground and then pour into a small to medium sized mixing bowl.  Add the sugar, melted butter and pinch of salt and mix to combine.  Add about 1 tablespoon of the digestive cookie mixture to each paper liner in the tin.  Then go back and add a bit more to each cup until the digestive mixture is evenly dispersed among the cups.  If by chance you end up with any left over digestive cookie base, it freezes well for usage later.  Bake for 5 to 7 minutes, until slightly browned on the edges. Remove from the oven to cool while you get on with the cheesecake filling.

Method for cheesecake filling:
In a large mixing bowl with a hand held mixer or in a stand mixer, beat the cream cheese until softened.  Add the sour cream and yogurt and beat again until combined together.  Scrape down the sides of the bowl using a rubber spatula and beat again (this makes sure there are no lumps later). Add the jam, sugar and vanilla and beat again until well incorporated.  Scrape down the sides of the bowl again and then add the eggs and mix until just combined (over mixing the eggs within the batter can cause cracking or irregular cheesecakes once baked).  Add the flour and a pinch or salt and mix by hand with a rubber spatula, making sure incorporate any lumps at the bottom or on the sides of the bowl.  Pour the filling into the pre-baked bases (I use a trigger handle ice cream scoop or a ladle) and bake for 10 to 15 minutes until almost completely set.  If there's a very slight jiggle in the centre of each cheesecake when you gently shake the muffin tin, they're done.  Let the cheesecakes sit in the tin to cool on the counter for 20 minutes and then place the tin in the fridge to cool completely (about 2 hours).

Method for White Chocolate Mousse:
Start by scalding the heavy cream (heating to just under a boil) and pour over the chopped white chocolate in a heat proof bowl. Let sit for a moment before adding a splash of vanilla and gently mixing with a rubber spatula until smooth.  Allow the mixture to cool in the bowl for a while (but not so long, it hardens) then whisk until slightly thickened and completely cooled.  Whip the remaining heavy cream to stiff peaks and gently fold into the white chocolate mixture using a rubber spatula. You should end up with a what looks like whipped cream, but has a richer flavour and slightly denser consistency.

Pipe the white chocolate mousse over each cooled and set mini cheesecake and either serve straight away or chill in the fridge for up to 2 days.  Add a fresh raspberry on top of the mousse for garnish if you like.