Monday, 18 July 2016
Bright and Fresh Lime Squares
I love making this recipe in the summer, there's something so satisfying about having a sharp and tangy dessert to cool your palate on a hot day. While I enjoy warm pies or richly decadent desserts in summer; when the heat hits, I'm drawn to cool, sharp and crisp flavours. As well as being a summer treat, these squares are wonderful anytime of the year and in any season. In fact, these are a great addition to a Holiday baking repertoire as it's something a little different, bright and tangy.
When I first started testing this recipe which I've adapted from Ree Drummond's recipe for Key Lime Pie, I was bound and determined to find and use Key Limes. After quite a search of local specialty stores and driving about 45 minutes from my house, I finally found a store that had Key Limes, I was stoked. Unfortunately, my excitement didn't last long as they were difficult to work with and not worth all that effort in my opinion... Key Limes are smaller than a traditional lime and I found extracting juice from them almost impossible. In all fairness, I've come across regular limes that were bone dry too, but usually that's just one in a bunch. Every single Key Lime I purchased (at a high cost I might add) was dry and yielded almost no liquid. As well, the zest of the Key Limes was quite bitter in comparison to regular limes. Almost as if a Lime and a Grapefruit had joined forces. To some, this might sound wonderful, but not really to my taste. At the end of the day, as much as I wanted to love Key Limes, I just found the cost and effort didn't match the affordability, availability and flavour of regular limes.
Key Lime search aside, this recipe is very easy and doesn't involve anything fancy - just mixing and pouring. In testing the recipe, I found the acidity of the limes needed something creamy to balance out the flavours. So, I decided to make a white chocolate ganache that gets spread out over the top of the baked squares. Not only does it add just the right balance of creaminess to tartness, it also creates a smooth as glass finish on the squares that looks stunning. Obviously, if this doesn't suit your tastes and preferences, it could be left off. A layer of whipping cream or a dollop on each square would be lovely looking and tasting too.
Key Lime Squares Recipe:
Crust:
18 Graham Crackers
1/2 cup of butter melted (in the microwave is fine)
1/4 cup plain granulated sugar
Filling:
1 can of sweetened condensed milk
Zest and juice of three limes
2 egg yolks
Ganache Topping:
1x 100g bar of good quality White Chocolate like Lindt, chopped or broken into pieces
90ml's or a generous 1/3 cup of heavy whipping cream
Splash of vanilla extract or vanilla bean paste
Method;
Preheat oven to 350F and line a 8 x 8 square baking tin with some parchment paper.
In a food processor, combine the graham crackers, melted butter and sugar. Blitz until blended and no large chunks of graham cracker remain. Pour mixture into the prepared tin and press into a flat layer on the bottom. Bake in the oven for about 5 to 7 minutes or until lightly golden and fragrant. Allow to cool slightly while making the filling.
In a medium sized mixing bowl, whisk together the sweetened condensed milk, zest and juice from the limes, and egg yolks until smooth and combined. Then pour filling into tin and on top of graham cracker crust. Bake in the oven for 10 to 15 minutes or until the filling is mostly set with a little jiggle remaining in the centre when the pan is gently shaken back and forth. Set aside to cool a bit while you make the ganache.
In a small saucepan, scald the cream (heat to just below a boil), the cream should make a loud spattering noise when you gently swirl in the saucepan. Place the chopped or broken up pieces of chocolate in a small heat proof bowl. Then pour the heated cream over the chocolate and let sit for 1 to 2 minutes. Then, gently stir using a rubber spatula until smooth and all the chocolate has melted into the cream. Add the splash of vanilla now (if you added it earlier most of the vanilla flavour would evaporate). Then pour over the baked filling and crust (use an offset spatula to spread out evenly if needed) and place in the fridge to cool completely and set up (about 4 -6 hours). Then cut into squares using a sharp knife and wiping the blade after each cut.
Happy summer!
Friday, 5 February 2016
Mini raspberry and white chocolate mouse cheesecakes
Lately I've been on what I can only describe as a mini cheesecake bender - any excuse (or not) to make them and off I go. Initially, I was drawn to making this because they look like an adorable cheesecake version of a cupcake. As well, I was asked to bring a dessert to a baby shower, and thought this would be a lot easier than having to slice pieces of cheesecake for everyone. The added benefit of no washing up a serving plate, was the cherry on top. Now I make these in lots of different flavours ranging from peanut butter cup, chocolate chip all the way to fruity versions like Meyer lemon and honey. They've all worked out really well and each time I successfully try a new flavour, it just spurns me on to come up with another new variety.
In this recipe, I've made a white chocolate raspberry version which is a great dessert for a shower (baby girl or wedding). Being that winter isn't exactly the best time for using fresh raspberries, I use raspberry jelly or jam. It adds the right amount of raspberry flavour, a nice pleasant sweetness, and little bit of tartness. However, if raspberries are in season, you could add about 1 cup of mashed raspberries to the recipe in place of the jam. Although, I would advise adding an additional 2 tablespoons of sugar to the recipe, otherwise the cheesecake will bake up a little too tart. As well, you may have to bake for 5 or so minutes longer than I've advised below. This is because fresh raspberries will add more water to the cheesecake batter, slowing the cooking time a little.
When I initially made this recipe, I went to the effort of making white chocolate mousse to pipe on top of the cheesecakes, since it was a celebration. However, this step could easily be left out and replaced with some whipped cream or a little white chocolate ganache drizzled over the top. As well, I used ground up Digestive Biscuits for the base as I find the flavour really compliments the raspberry and white chocolate. It practically goes without saying, but using ground up Graham Crackers works just as nicely
Here's my recipe:
Base:
13 digestive biscuits
1/4 cup unsalted butter, melted
2 tablespoons of white granulated sugar or caster sugar
Pinch of salt
Cheesecake Filling:
2 x 8oz packages of cream cheese
1/4 cup sour cream
1/4 cup plain yogurt
2 teaspoons of vanilla
1/4 cup granulated sugar or caster sugar
1/4 raspberry seedless jam or jelly
2 eggs
2 tablespoons flour
Pinch of salt
White Chocolate Mousse:
100g package of white chocolate (I use Lindt)
237ml carton of whipping cream
Dash of vanilla
Preheat oven to 350 degrees F. Line a 12 cup muffin tin with cupcake or muffin papers.
Method for the cheesecake base:
Blitz digestive cookies in a food processor until finely ground and then pour into a small to medium sized mixing bowl. Add the sugar, melted butter and pinch of salt and mix to combine. Add about 1 tablespoon of the digestive cookie mixture to each paper liner in the tin. Then go back and add a bit more to each cup until the digestive mixture is evenly dispersed among the cups. If by chance you end up with any left over digestive cookie base, it freezes well for usage later. Bake for 5 to 7 minutes, until slightly browned on the edges. Remove from the oven to cool while you get on with the cheesecake filling.
Method for cheesecake filling:
In a large mixing bowl with a hand held mixer or in a stand mixer, beat the cream cheese until softened. Add the sour cream and yogurt and beat again until combined together. Scrape down the sides of the bowl using a rubber spatula and beat again (this makes sure there are no lumps later). Add the jam, sugar and vanilla and beat again until well incorporated. Scrape down the sides of the bowl again and then add the eggs and mix until just combined (over mixing the eggs within the batter can cause cracking or irregular cheesecakes once baked). Add the flour and a pinch or salt and mix by hand with a rubber spatula, making sure incorporate any lumps at the bottom or on the sides of the bowl. Pour the filling into the pre-baked bases (I use a trigger handle ice cream scoop or a ladle) and bake for 10 to 15 minutes until almost completely set. If there's a very slight jiggle in the centre of each cheesecake when you gently shake the muffin tin, they're done. Let the cheesecakes sit in the tin to cool on the counter for 20 minutes and then place the tin in the fridge to cool completely (about 2 hours).
Method for White Chocolate Mousse:
Start by scalding the heavy cream (heating to just under a boil) and pour over the chopped white chocolate in a heat proof bowl. Let sit for a moment before adding a splash of vanilla and gently mixing with a rubber spatula until smooth. Allow the mixture to cool in the bowl for a while (but not so long, it hardens) then whisk until slightly thickened and completely cooled. Whip the remaining heavy cream to stiff peaks and gently fold into the white chocolate mixture using a rubber spatula. You should end up with a what looks like whipped cream, but has a richer flavour and slightly denser consistency.
Pipe the white chocolate mousse over each cooled and set mini cheesecake and either serve straight away or chill in the fridge for up to 2 days. Add a fresh raspberry on top of the mousse for garnish if you like.
Friday, 15 January 2016
South Indian Curry
It's a new year which for me, means trying new recipes and getting re-invigorated in the kitchen. Not to mention, January tends to bring out a desire to eat "better" or "cleaner". While I hate using terms like these (as it implies any other way of eating is "bad" or "dirty") I too find myself eating lighter and using more vegetables in January. Perhaps this is just the natural cycle of life - after eating a fair amount of rich foods in December, we want a change of pace in January. I'm in the mood for food which is full of brighness, freshness, and above all has a lot of flavour.
I really get a lot of pleasure from cooking different cuisines and foods from all over the globe. I especially love Indian cuisine and have tried my hand at cooking a lot of northern Indian or Punjabi style curries in the past (which I absolutely adore). However, I haven't really tried cooking much from the south of India and specifically vegetarian Indian cuisine.
I often come across South Indian curry recipes in magazines and in some of my cookbooks and often make a mental note to try these recipes. However, it wasn't until recently that I actually cooked a southern Indian curry and immediately fell in love. I took inspiration from recipes I've seen and created my own version of this style of cuisine. Subsequently, I was amazed at how complex and vibrant the flavours are without using any meat protein. I must be honest and say, often times when I make a vegetarian dish for myself (who's absolutely not a vegetarian) I end up adding some chicken stock to amp up the flavour. However, this recipe completely holds it's own without the addition of any stock. Making it a great option if cooking for a vegan or vegetarian. As well, this dish somehow balances being nourishing and yet very sustaining at the same time; this is not the type of food that will leave you needing a second dinner later on in the evening. It will leave you feeling pleasantly satisfied but not bloated and full.
I must say, I can't speak to how "authentic" this recipe is or if it would be considered a North Americanized knock off of true south Indian cuisine. However, I feel that it's okay to not always be perfectly authentic when cooking cuisines of other countries. Often times, it's difficult to find the necessary ingredients to puritanically re-create food we've experienced in restaurants or from other parts of the world. Not to mention, cooking in such a strictly confined way really kills the creativity and spontaneity of home cooking. The food police aren't knocking on doors to critique the ingredients we choose to use in the privacy of our own kitchens. Not to mention, it's my experience that when you go looking for the truest or most authentic recipe for a traditional dish (from any number of cuisines) you get a multitude of options and recipes. That is to say, everyone has their own way of cooking the food of their culture and recipes differ from family to family. It's my opinion that cooking in the most authentic way for any type of cuisine doesn't really exist as it varies from region to region and person to person. At the end of the day, I love to cook with the joy and pleasure of being inspired to try new things in my kitchen; not constricted of worries people will disapprove or judge.
Here's my recipe for South Indian Curry:
Vegetable or Canola Oil
1 medium onion chopped
1 clove of garlic minced
1 tablespoon of sesame seeds
1 tablespoon of curry powder (I used Madras, but any curry powder will do)
Cayenne Pepper to taste (I used 1/2 teaspoon, for hot)
3 Roma tomatoes roughly chopped
1/2 cup of water
1 red pepper roughly chopped
large handful of green beans chopped
1 398ml can of pinto beans
Salt and pepper to taste
Handful of cilantro
Zest and juice of a lime
Over medium heat, warm a large cast iron skillet or pan. Add about 1 tablespoon of vegetable or canola oil and then add the chopped onion and garlic and saute until the onions are slightly translucent. Then add the sesame seeds, curry powder and cayenne pepper allowing the mixture to continue cooking for a minute or so to toast both the seeds and the spice.
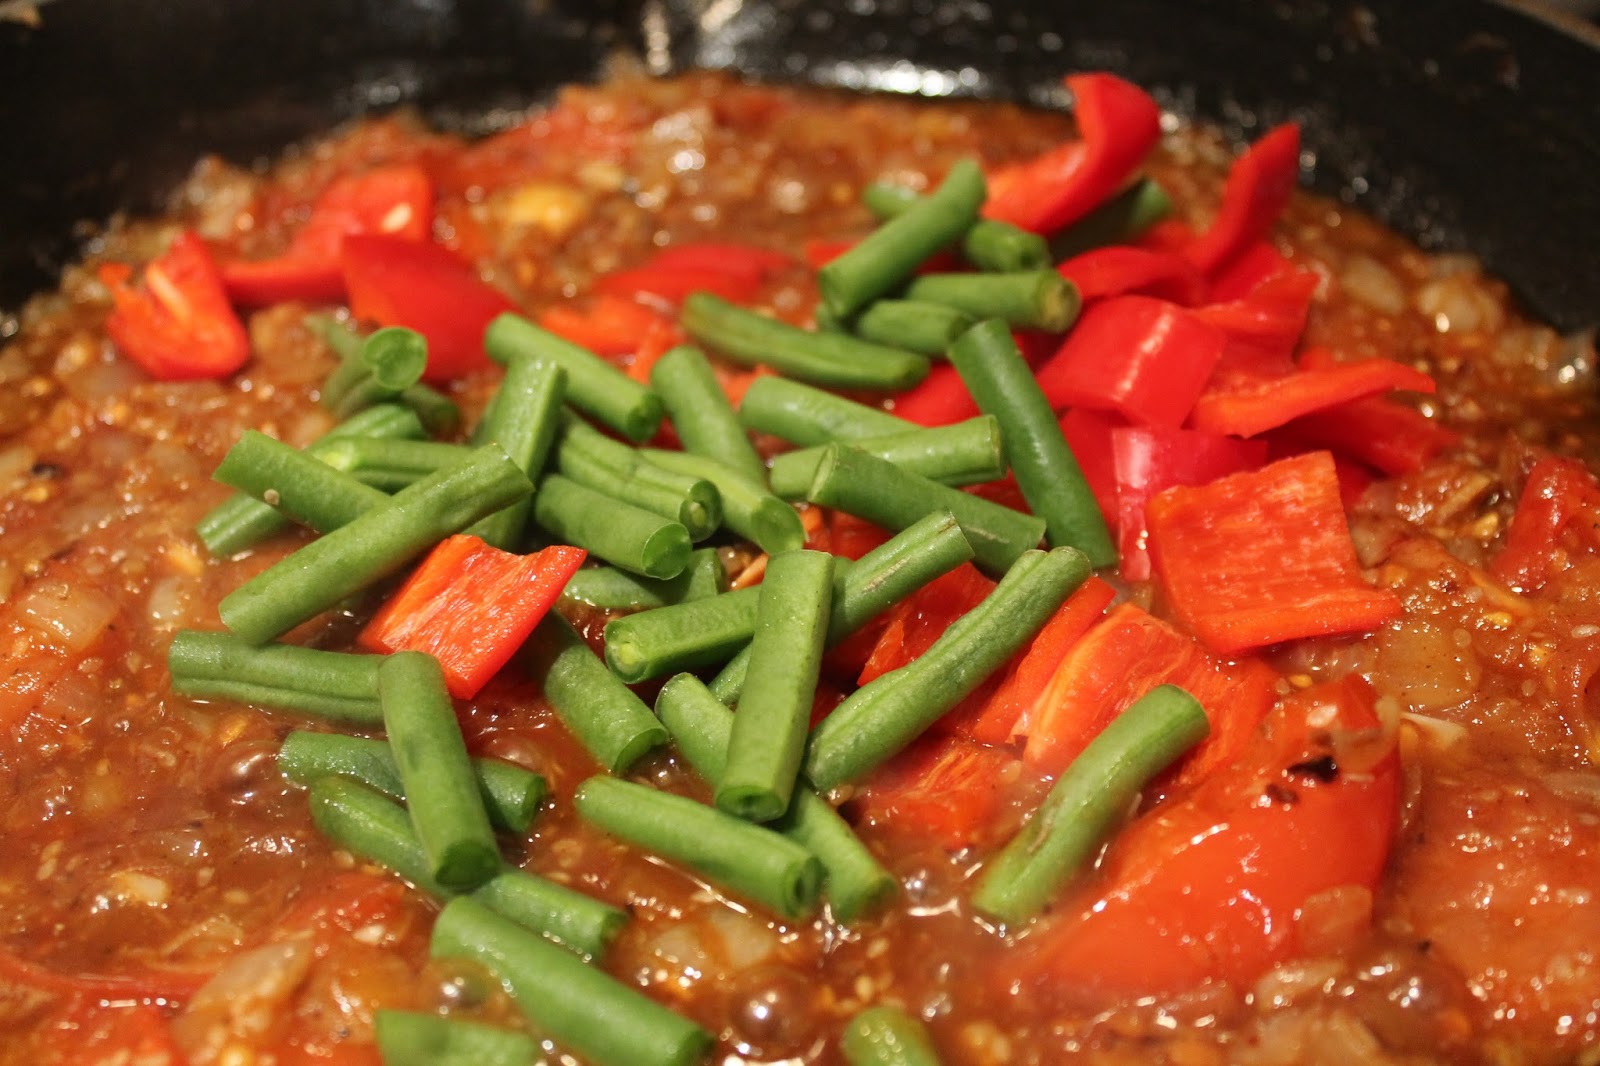
Now add the tomatoes, tossing then slightly with the onion mixture. Add the water and allow the tomatoes to cook down, brown well, and break apart while the liquid reduces to a nice thick tomato sauce.
Add the peppers, green beans and pinto beans (or any beans you like) and cook for about 2 minutes or until the beans and peppers are cooked to al dente and slightly softened and the green beans are still vibrantly green.
Season with salt and pepper to taste and add the juice and zest of half a lime to the mixture and serve with some basmati or jasmine rice with a large handful of roughly chopped cilantro scattered over top and lime wedges alongside.
Tuesday, 22 December 2015
Christmas Turkey Cocktail Party Style
This year, it's my turn to host family on Christmas Day - we usually get together to open presents and have a nice turkey dinner. I want the day to be like my childhood Christmases filled with lots of delicious food and no shortage of family fun. My mom had a way of making Christmas feel so cozy and nice; I have no memory of her being stressed out or overwhelmed - if she was, it never showed. Now that I'm an adult and my Mom is no longer with us, I want this Christmas to be like it was when I was a kid, where spending time with people you love was more important than everything being perfect.
When I say I don't want things to be perfect, that isn't to say I'm going to haphazardly slop some food together without caring. What I mean is, I don't want to become obsessed with everything being so perfect I end up in a corner crying in the fetal position because something didn't work out exactly the way I wanted. I've been to dinners or parties where the host is wound up so tightly from going all Martha Stewart, no one really has a good time. Instead, I'm going to make my life easier by creating a meal that is as equally delicious as it is easy to put together. Hopefully if I'm relaxed about things and enjoying myself, my guests and family will feel that way too. Besides, I don't want anything to get in the way of having a good time at Christmas, I wait all year for this!
Let's get down to brass tacks - the food... When I first started thinking about exactly what to make, my mind was already made up on Turkey dinner, it was just a matter of figuring out the sides etc. However, there are going to be 13 of us for dinner, and I just don't have a big enough table to comfortably seat that many people. My natural instinct is to do what my Mom did when we had more people than spots at the table, which was to have open seating around the house. Everyone just found a spot to sit and eat - be it the dining room table, or the couch. However, the more I thought about it, the more I wasn't keen since it might be difficult for people to balance plates on their laps and eat a full turkey dinner. I started thinking about the idea of doing a meal cocktail style which everyone could help themselves and the food would be easy to eat standing up. The only problem I saw with this idea was having to give up turkey for some other easy to eat menu. However, in my opinion, it's just not Christmas without turkey.
Well, I've come up with a way to have the best of both worlds by doing turkey and stuffing pinwheels, fried mash potato balls that will change your life, gravy (which is incredibly delicious, I make in advance, and is a Jamie Oliver recipe) all balanced with a nice green veg of asparagus. This way, everything can be eaten very easily while either standing up or sitting with a plate on your lap.
As well, a lot of this menu can be done a day or two in advance making the work on Christmas day super easy and stress free. The turkey and stuffing pinwheels can be assembled in advance and then popped in the oven later. Same goes for the potato balls - assembled in advance and then fried right before dinner is served. Lastly, the asparagus can be prepped ahead of time and then be stored in the fridge until roasted in the oven.
The only complicated part of this menu is that I butcher a whole turkey and take off the turkey breasts to make the pinwheels. The reason I'm doing it this way, is because I already have a whole turkey in the freezer ready and waiting to go. However, you could just as easily buy two turkey breasts from a butcher or the grocery store instead. Oh and don't worry, I don't waste the remaining parts of the butchered turkey - I use it to make stock for the next time I have turkey.
Here's my recipe:
2 turkey breasts (either butchered from a whole turkey or bought already removed)
1 tablespoon of olive oil
1 tablespoon of butter
1 medium onion finely chopped
1 clove of garlic minced
Fresh thyme, rosemary and sage finely chopped to taste
2 cups of cubed stale bread (store bought is just fine)
Salt and pepper to taste
Handful of dried cranberries (optional)
3/4's cup of chicken or turkey stock
Preheat oven to 350 degrees F.
If you want to try sectioning the turkey, I highly recommend checking out the BC Turkey site as it has easy step by step directions for doing so.
Cut each turkey breast in half across the grain (not down the middle of the breast, see the BC turkey site above), so you have four pieces of breast. Place one of the breast pieces between two large sheets of plastic wrap or parchment paper large enough to cover the breasts and allow enough extra room for them to expand once flattened. Using a meat mallet or a heavy rolling pin, bash the meat all over until it's flattened out to about a 1/4 inch thickness. It's great if you do this rather evenly, but don't fuss if you have some thicker and thinner parts, it will still work out fine. Alternatively, you could purchase 4 large turkey scallopini's from a butcher, though it's a little pricey.
Store the turkey scallopini in the fridge while you prepare the stuffing. Heat a medium skillet over low to medium heat and add the olive oil and butter. Add the onion, garlic and herbs and cook until the softened. Add the bread, stirring well to combined with the onion mixture. Once the bread is broken up and toasted a little, add the cranberries (if using) and season with salt and pepper to taste. Add the stock and allow the mixture to continue cooking un-covered until the bread has mostly absorbed the stock. Set aside to cool slightly before assembling the pinwheels.
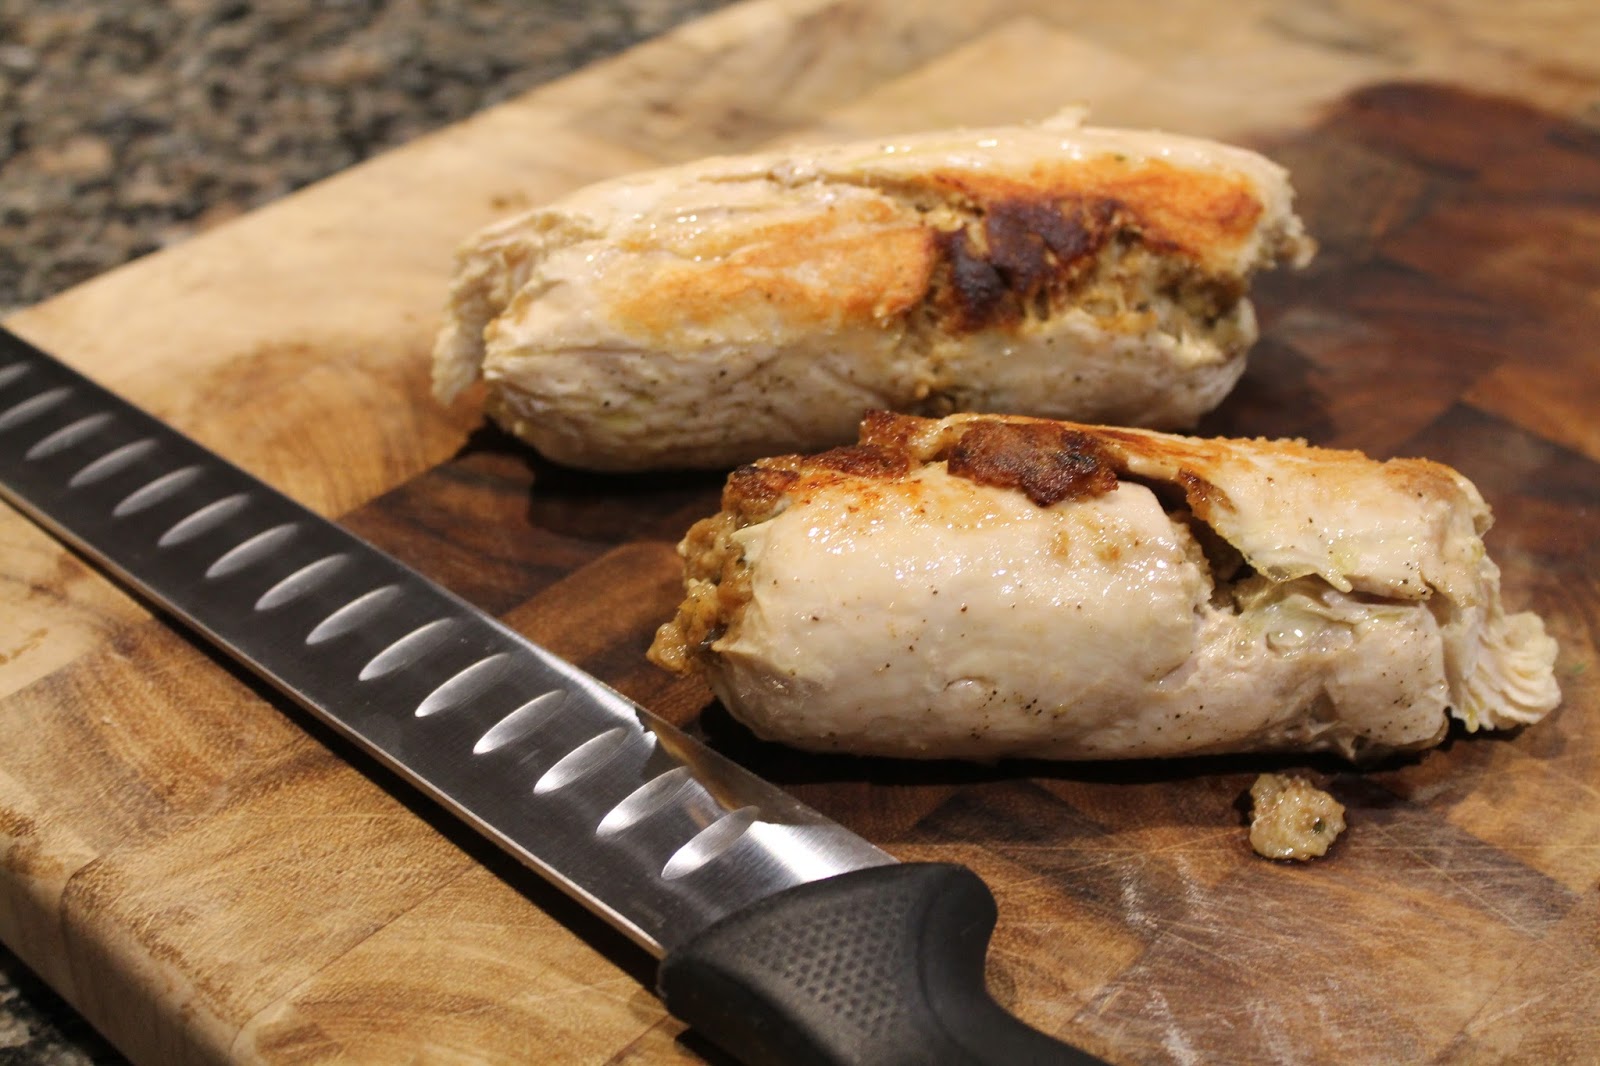
Lay out a sheet of aluminium foil and then some parchment paper (on top of the aluminium foil) both slightly larger than the flattened turkey scallopini. Drizzle a little olive oil on the foil/parchment, then lay one of the scallopini pieces down, and scoop some stuffing on the turkey. Spread the stuffing out in an even and and fairly thin layer; too much and the stuffing with get squished out of the pinwheel. Roll up the turkey into a log and then wrap in the paper and foil so that the turkey log is fully encased. Twist up each end of the aluminium foil to seal the whole thing and place on a baking tray. Repeat with the remaining turkey scallopini pieces. Bake in a 350 F oven for 40 minutes by which time the turkey will be cooked through. As well, you could puncture through the aluminium/parchment paper to test the turkey with a meat thermometer if you wanted to double check, it should be 180 degrees F. Allow to rest in the foil packages for at least 20 minutes before serving. Un-wrap and slice into 1/4 inch thick pinwheel slices and serve.
One additional thing I like to do is sear the cooked, un-wrapped and un-sliced logs in a hot skillet for a few minutes on each side and then slice. I prefer the look of the nicely browned outside as opposed to the plain pinwheel. You could absolutely leave this step out if you prefer or don't have time. Lastly, since I originally posted this recipe, I've made it again and made one slight addition... I grated some mandarin zest over the turkey before wrapping in aluminium foil and baking in the oven. I had some on hand and it added a nice brightness to the meal. However, you could certainly leave this out, if you don't have an orange around.
Fried Mashed Potato Balls:
(This is a fantastic way to use up left over mashed potatoes)
2 pounds of potatoes cooked, mashed, buttered, seasoned and cooled completely in the fridge.
4 cups of Panko bread crumbs
3 eggs
Salt and pepper to taste
Canola or vegetable oil for frying
Set out two medium sized (preferably shallow) bowls and add the Panko bread crumbs to one and whisk the eggs in the other. Season both bowls with a generous amount of salt and pepper. Take a small handful of cold mashed potatoes and roll between your hands into small ball (about the size of a chocolate truffle). Then dip and coat the ball in egg, and then dip and coat the ball in Panko bread crumbs. Place on a baking tray while you get on with the remaining mashed potatoes until done.
Add oil to large sized dutch oven or pot, enough oil to fill the pot at least 1/4 full but no more than 1/2 full. Heat the oil to 350 degrees F (if you have a thermometer) or hot enough that when you drop a couple bread crumbs they sizzle and start to brown within 30 seconds (they shouldn't burn within that time or the oil is too hot).
Fry the balls in batches, to prevent crowding of the pan, until nicely browned. Place the fried balls to drain on a baking sheet lined with some paper towel. You can store in a low oven (about 225 degrees F) to keep warm until ready to serve dinner.
Roasted Asparagus:
2 bunches of asparagus, woody ends trimmed off.
1/4 cup olive oil
Clove of garlic, finely grated or chopped
1 teaspoon of red pepper flakes
Lemon juice to taste
Salt and pepper to taste
Prosciutto (optional)
Preheat oven to 425 degree F. Line two baking trays with aluminium foil (for easy clean up).
Clean and trim asparagus, then toss in the olive oil, garlic, red pepper flakes, and lemon juice. Then sprinkle over some salt and pepper. Wrap Prosciutto around each asparagus spear (optional) and lay out evenly between the two baking trays and bake in the oven for 5 to 8 minutes until the ends start to slightly brown but they're still mostly vibrant green and the prosciutto is nicely crisp.
Sunday, 20 December 2015
Neapolitan Christmas Cookies
I first saw these cookies in a magazine article and was immediately drawn in by how festive and pretty they are. At the same time, I was puzzled as to why they were referred to as "cookies" since they really look more like cake squares to me. However, once I actually tasted them, I could understand a little more why they're referred to as cookies. While the texture does have some cake qualities, they have more of a crumbly consistency like that of an almond shortbread cookie. Not only are these cookies impressive to look at and are surprisingly easy to make, they also live up to their appearance in flavour too. One of my biggest pet peeves is when food looks absolutely gorgeous, but the flavour falls flat.
Neapolitan cookies (also known as Venetian Cookies, Italian Christmas Cookies, or Rainbow Cookies) are an Italian American creation quite popular in the 70's. Traditionally. these cookies consist of six layers; chocolate on the top, then a red cookie layer, apricot jam, a plain (or blonde) cookie layer, raspberry jam, and finally a green cookie layer. As well, the cookie batter always contains Marzipan, which is creamed with the butter.
I decided to create my own recipe and put a modern twist on a classic. While I like the idea of jam in the layers (and I'm sure a purist would say it's a must), I didn't want to go out and buy two different jars of jam or have to make my own just for this recipe. So, I decided instead to replace the apricot layer with milk chocolate Ganache and the raspberry layer with white chocolate Ganache (though raspberry white chocolate would be really good). As well, I'm not a big fan of Marzipan, I find the texture to be kind of strange and the combination of rose water with almonds is a little too strong for my palate. I think part of the reason I don't like it, is most of the time the Marzipan you can buy from the store (or at least where I live), has been sitting in the package for a long time. If it was freshly made, perhaps I would feel differently.
When coming up with my recipe, I toyed with the idea of making Marzipan from scratch, or to be more exact; almond paste which is exactly the same thing only minus the rose water, From what I had read, it seemed pretty easy - just blitz almonds, egg whites, almond extract and powdered sugar in a food processor until it forms a paste. However, I realized I could essentially create the same effect by mixing ground almonds, with some of the meringue which the cookie recipe calls for and kill two birds with one culinary stone. The results were exactly what I was looking for, the cookies have that half cake, half crumbly cookie texture just like the traditional recipe and the chocolate is perfect with the delicate almond flavour of the cookie. Not to mention, I love when a recipe uses three types of chocolate, in this case dark chocolate for the top of the cookies, then milk and white chocolate in the layers. It's a really nice mixture of chocolate goodness.
My mom always made the same baked goods every Christmas, which was really comforting and nice. I loved to hear her puttering away in the kitchen baking. I lost my mom when I was 24 years old, I wish I could go back and learn her recipes she could instinctively make from memory. Instead, I'm starting my own traditions and compiling recipes from year to year that will hopefully become a part of my children's treasured memories one day. I think these Neapolitan Cookies might be on my list of baking to make every year.
Neapolitan Cookie Recipe:
4 eggs (whites separated from the yolks)
1 cup of sugar
1 1/4 cups ground almonds
1 teaspoon vanilla extract
1/4 teaspoon of almond extract
1 cup of butter at room temperature
2 cups of cake and pastry flour
20 drops of red food colouring
12 drops of green food colouring
100 gram bar of milk chocolate (I used Cadbury)
100 gram bar of white chocolate (I used Lindt)
175ml of heavy cream
8 ounces of semi sweet chocolate
Preheat oven to 350 degrees F. Grease and line with parchment paper three jelly roll sized cookie sheets, making sure to have some excess parchment hanging over the two shortest ends of the pan which will make it much easier to life each layer out of the pan later. Set aside.
In a stand mixer (or a large mixing bowl using electric beaters), whip the egg whites and a 1/4 cup of the sugar (reserving the 3/4's of a cup for later) until stiff peaks are formed. Transfer all but a large dollop (about 1/2 cup) of the egg whites to another bowl and set aside. Add the ground almonds to the remaining dollop of the meringue you left in the mixing bowl, then the egg yolks, and mix on medium for a couple of minutes until well combined. As mentioned above, this step is my way of making almond paste, negating the need for Marzipan. Then add the butter, vanilla and almond extract to the almond mixture and beat on high for 2 minutes. Remove mixing bowl from stand mixer, sift in the pastry flour and mix by hand (the batter will be stiff at this point). Then fold in the remaining meringue that you have set aside. Divide the batter evenly into three separate bowls and add red food colouring to one bowl of batter, green food colouring to the second bowl and leave the third bowl plain.
Pour each bowl of batter into one of the prepared jelly roll pans and spread the batter out evenly with an offset spatula. You should have a tray with green batter, red batter and one plain. Bake all three trays in the oven for 8 to 10 minutes, you may need to shift the trays in the oven half way through baking to ensure they all bake evenly and are done at the same time. Let cool while you make the Ganache.
Break up each bar of chocolate and place the milk chocolate in a small bowl and the white chocolate in another bowl. Heat up the cream on the stove in a small saucepan and pour 100ml's of the cream over the milk chocolate and 75ml's over the white chocolate. Let each bowl sit for a couple of minutes, then using a rubber spatula stir until the chocolate has melted together with the cream forming a Ganache. Set aside each bowl of Ganache to cool and thicken slightly.
Once everything has cooled to room temperature, start assembling the cookies. Remove the green layer from the pan, by lifting up on the parchment paper that is hanging over two ends of the pan (as mentioned above). Place the layer on a cutting board to make for easier slicing later (in a pinch an inverted jelly roll pan works too). Pour the white chocolate Ganache onto the green layer and spread it around leaving about a 2 cm border around the edges. Then remove the plain layer from it's pan and place on top of the green layer. Then pour the milk chocolate Ganache over spread out in the same way, leaving a 2 cm border around the edges. Place the final red layer on top of everything and then cover the entire thing with a plastic wrap ensuring to make air tight (you'll probably need a couple layers of plastic wrap). Put a baking tray on top of the whole thing and place in the fridge for at least 2 hours, or over night. The baking tray on top adds some pressure which will help the layers to fuse together really well.
Once the whole tray has been chilled for at least 2 hours or more, remove from the fridge take off the baking tray placed on top. Let sit still covered in the plastic wrap while you get on with melting the chocolate for the top of the cake.
In a heat proof bowl, add the semi sweet chocolate and melt over a double boiler (or in the microwave at 30 second intervals). Remove the plastic wrap from the cake, and pour the melted chocolate over the top of the cake. Using a small offset spatula, spread and swirl the chocolate over the entire top of the cake and spread right out the edges, don't worry if some spills over. Put back in the fridge uncovered for 20 to 30 minutes to set. Remove from the fridge and (using a sharp preferably long knife), trim off a thin slice from each of the four sides. This will make all the squares look neat and tidy when cut into squares leaving no pieces with rough edges. Not to mention, the pieces you remove can be the cooks snack! Then slice the remaining slab into squares.
Thursday, 17 December 2015
Pretzel Turtles
Where do I start... These are one of the most addictively wonderful sweet treats I've ever made. They are exactly how they sound, a pretzel Turtle. Much like the commercial chocolate treats, only with a kick of salt from the pretzel component. You may be thinking why make these, when you can buy a box of perfectly good Turtles from the store. I can't disagree, you can buy perfectly delicious chocolates and many other delicious goodies from the store. However, I have something of an obsession for sweet and salty mixed together and for me, this is the differentiating component between the homemade variety and store bought Turtles.
These are so easy to make, don't require special ingredients or complicated processes, so it's not much of a hardship to make. As well, when I put them together I sit at my kitchen table pouring chocolate and placing the pretzel/caramel/pecan piece on top. So, not only are these extremely delicious to eat, they are as equally relaxing to make.
I could go on and on about how good these are but... A picture speaks a thousand words... Scroll down for recipe below:
52 mini pretzels
52 chewy soft caramels
52 pecan halves
16 ounces milk chocolate melted
Preheat oven to 350 degrees F, line two baking trays with parchment paper. On one of the trays, spread out the pecan halves and toast for about 5 to 7 minutes until the nuts are fragrant, set the nuts aside in a dish to cool until needed later. Then space the pretzels out between the two trays and place a piece of caramel on top of each one. Bake in the oven for 5 minutes or until the caramel has softened and is starting to slump down into the pretzel. Remove from the oven and press one of the pecans on top of the caramel.
Next step is to melt the milk chocolate over a double boiler also knows as a bain marie.
Once chocolate is melted, use a tablespoon measure and scoop out some chocolate (like I mentioned, I do this sitting at the kitchen table) and pour the chocolate into round little patties onto the same parchment lined trays used before. The chocolate patties should be big enough for the pretzel to sit nicely on it with a border of chocolate all around the pretzel. Do this until you've used up all your chocolate and each caramel pretzel. Put the trays in the fridge to allow the chocolate to firm up (can be frozen for up to 1 month)
That's it!
Merry Christmas and Happy Holidays!
Wednesday, 16 December 2015
How to roast a turkey
When it comes to roasting a turkey, I find most people fall into one of two categories: those who have a tried and true method, or those who have no idea what to do and are a little frightened with the prospect of even attempting roasting a turkey. One of my good friends has had a few turkey dinners go sideways, and finds the whole process very stressful. One time, she forgot to take her turkey out of the freezer to properly defrost, and in a moment of panic, decided to throw it in the oven still frozen and just cook it longer hoping for the best. After a few hours in the oven, the turkey looked beautifully bronzed like something out of a Courier and Ives Christmas card. However, when it came time to carve the bird, to her horror it was still raw inside. I think this is the type of situation that scares people off making turkey dinner - the pressure of having something go wrong when you're cooking for a crowd. No one wants the culinary equivalent of having your pants pulled down in public.
The first time I cooked a turkey dinner, I took to the internet for help and advice only to be left with my head spinning from the sheer amount of information (much of which was contradictory from one site to another). I remember wishing that all the information I needed to know could be found in one helpful guide. Therefore, I've come up an easy, three step method I'm happy to share with you.
Step 1:
I brine my turkey (as I've outlined in my turkey brine post) to ensure a super moist and juicy bird. Many people think this is just too difficult or time consuming to bother with, and if you choose not to brine your turkey, it wouldn't be the end of the world. However, it's really not that troublesome because the brine is done two or three days ahead of when you actually roast the turkey. This way, you're not rushing around on turkey day stressed and feeling like the whole thing is just too overwhelming.
Step 2:
I think one of the keys to a delicious turkey, is to smother the turkey butter and to make sure it's well seasoned with salt and pepper before going in the oven. I like to make a herb butter mixture, which is essentially butter mixed with some herbs, garlic and a little olive oil (which helps to aid in a rich bronze finish, while at the same time preventing it from burning). See the recipe below.
Step 3:
The final and most important part of the process; roasting the turkey for the correct amount of time, letting the bird rest (tented in aluminum foil) and testing for doneness. If you dispense with every other recommendation I've made thus far- this is the portion of information that really counts.
Start by having a rough idea of how long the turkey will be in the oven to fully cook. Generally speaking, 20 minutes of cooking time per pound at 350 degrees F will yield a very good result. While it's roasting, I like to baste only once or twice, I don't fuss about doing it every 30 minutes as some recommend because the butter ensures a nice golden finish. To test for doneness, I have four ways of ensuring my turkey is fully cooked and juicy.
First: I remove the turkey from the oven to get a good look at the it and see if the skin is nicely bronzed, this may seem obvious but you'd be surprised how many people overlook the appearance of their bird.
Second: I press down on the breast meat with my fingers to feel how firm it is (don't worry, if you only touch down for a second you won't burn yourself). If the breast meat feels squishy it'll need to go back into the oven for a while.
Third: I move the legs back and forth a little - if they move quite freely and without of a lot of resistance, the turkey is sufficiently cooked.
Fourth: I take a paring knife and make a little cut in the space between the thigh and the breast to take a look at the joint area under the skin (I do this on both sides of the turkey). If the juices are nice and golden the turkey is cooked. Contrary to popular opinion, the juices will never really end up "clear" because turkey juices always have some tint of colour even when fully cooked, such as a yellow gold colour. The key is you don't want the juices to be red or very pink, since that will indicate the meat is not cooked enough and need to spend more time in the oven.
Once you've determined your turkey is cooked, let the turkey rest out of the oven at room temperature for at least 20 to 30 minutes; 45 is optimal. This allows the meat to settle after being in the high temperature of the oven and allows some of the juices to re-distribute and get absorbed back into the meat and makes for better texture and moistness. Tent the turkey in aluminium foil and the residual heat will keep the turkey cozily warm for quite some time.
Herb Butter
2 cups or 1 pound of unsalted butter and room temperature
Small bunch of herbs - I use rosemary, thyme, sage and parsley
One stalk of green onion torn apart or chopped in half
1 shallot, rougly chopped
1 clove of garlic, peeled
1 teaspoon of olive oil
Start with preparing the herbs by removing the rosemary needles and thyme leaves from the stalks and roughly tearing apart the sage and parsley. Then put the prepared herbs with all the other ingredients in a food processor and pulse until everything has combined together and is still a little chunky. Alternatively, you could finely chop the herbs, green onion, shallot, garlic and combine with the room temperature butter and the olive oil in a mixing bowl. Any left over butter can be frozen for up to 6 months.
Preheat the oven to 350 degrees F put your defrosted or fresh turkey on a roasting rack placed inside the roasting pan. If you don't have a rack that sits inside your tin or are using a throw away aluminum tin, then simply cut up some carrots and onions and place your raw turkey on top of them so the turkey isn't sitting directly on the bottom of the pan. The turkey will cook more evenly if slightly elevated from the bottom of the roaster. Then pat the un-cooked turkey with paper towel to make sure the skin is dry before slathering your turkey with the butter. If you attempt to smooth the butter on the turkey without patting it dry first, the butter won't spread out nice and evenly making the process much more difficult. If you end up not drying the turkey well enough, and easy fix is to melt the butter mixture and pour it over the turkey and then use your hands to disperse evenly. I also try to get some of the butter under the skin of the breast to help keep the breast meat extra moist and seasoned.
Now sprinkle a generous amount of salt and pepper over the buttered turkey and place in the oven to cook for 20 minutes per pound at 350 degrees F and then use the techniques outlined above to test for doneness. Let the cooked turkey rest for 45 minutes before carving and eating.
While I know this has been a long post, I do want to leave you with a couple of last thoughts and tips on turkey roasting. Don't bother with a meat thermometer - it will do nothing but induce stress and fear that the damned turkey never reaches the correct temperature in the 8 million spots you end up testing in an effort to get an accurate reading (though a digital meat thermometer is not too bad at this, but a bit more of an investment). My first day of culinary school was spent listening to the chef explain how much he hates meat thermometers and I must say I agree with him.
I feel it is okay to stuff a turkey - often times you will hear people advising not to do this as the turkey cavity is "toxic" - their words not mine. While it is true that you will need to cook your turkey longer in order to fully cook the stuffing inside, there is a way to do this without over-cooking the turkey itself. I recommend cooking your stuffed turkey in the same fashion noted above then spoon the stuffing into an heat proof serving dish that you put into the oven to continue cooking while the turkey rests, problem solved. Lastly, there is a lot of information about turkey cooking that is from a food safety perspective. While I value the need for food safety, I do think that much of what these experts say causes more anxiety than it actually helps. I'm left feeling I never want to cook anything let along a turkey for fear of ending up sick on the bathroom floor. I feel that you have to trust your gut and use common sense in the kitchen and most of all not get into a panic over a turkey, it's just not worth it.
Subscribe to:
Posts (Atom)