Pages

Thursday, 18 December 2014

Holiday Crispy Treats


Let me just say that while I don't consider myself a food snob, I don't normally go for the type of holiday treat that involves using sweetened condensed milk, Rice Krispies and marshmallows. However, these festive treats are so seductively delicious that I simply can't resist.

My good friend Michelle made these for me a number of years ago and I was instantly hooked.  Her recipe involved melting sweetened condensed milk and McIntosh toffee bars together to make a caramel.  Then you dip a marshmallow into the caramel and roll the whole thing in the holiday Rice Krispies.  In the years since I was first introduced to this recipe, it's become very hard to find McIntosh toffee bars, so I've adapted the recipe a little.  Instead, I caramelize brown sugar and butter together and then add a can of sweetened condensed milk.

I find these treats don't have a long shelf life (not that they need it since they get eaten up quickly) because the Rice Krispies tend to go stale if they sit out at room temperature.  Thus, I recommend making them and freezing immediately.  When you're ready to eat them, take out only what you'll need preventing wastage.  Not to mention, the treats taste extra delicious when they're nice and cold.

Here's the recipe:

1/4 cup of butter
1/4 cup of brown sugar
1 can of sweetened condensed milk
Pinch of salt
Few drops of vanilla extract
Bag of large marshmallows
Holiday Rice Kripies

Preparation:
Pour about 5 cups of Rice Krispies into a medium sized mixing bowl and set aside  Cover two jelly roll tins or small baking trays with aluminium foil.  Finally, have a few toothpicks or bamboo skewers ready to go (to use for dipping the marshmallows into the caramel).


In a medium sized heavy bottomed saucepan, melt the butter and brown sugar on medium low heat. Add the can of sweetened condensed milk and stir (the mixture will most likely start to bubble up a bit, but stirring constantly will help settle things down).  Continue to stir the mixture with a wooden spoon or spatula (on medium low heat) until it's a nice golden caramel colour.  Add a pinch of salt and a few drops of vanilla and stir to incorporate.


Bring the pot of caramel over to your bowl of Rice Krispies and prepared baking sheets.  Using a tooth pick or bamboo skewer, stab a marshmallow on one end so that you can dip the whole thing into the hot caramel.  Once dipped in caramel, roll it in the Rice Krispies and then place on the baking tray, spacing the treats apart from one another.  Keep doing this with the marshmallows until you've used up all your caramel sauce. You may need to periodically heat up the caramel sauce if it starts to harden (making it difficult to dip the marshmallows).


Once you've finished dipping and rolling, place your trays in the freezer.  Once all the treats are frozen through, you can place them all together in a freezer storage bag.  Freezing them first on the trays prevents them from all clumping and sticking together.


Happy Holidays!


Sunday, 14 December 2014

Butternut Squash Coconut Curry Soup


Many experienced chefs will tell you the true test of a good chef is how well they make soup. Personally I find a lot of soup recipes a little low on flavour, not great texture and kind of boring. However, this is not a problem with my Butternut Squash Coconut Curry soup.  I use a variety of herbs and spices making the soup bold in flavour, while the butternut squash adds a smooth texture.

While I wouldn't claim to be an expert on Indian cuisine, I really love experimenting with the spices and flavour profiles.  I'm not sure how traditional Butternut Squash is to Indian cooking, but as with most squash, it's mild flavour compliments many different cuisines.  The spices I've chosen are common in a lot of curry recipes and work well in this soup, but you could use any spices you like. Alternatively, you could substitute a couple tablespoons of curry powder which usually contains a lot of the same spices I've used.

I start out by sauteing the onion and garlic with all the spices, this toasts all the spices and develops a lot of flavour in a short amount of time.  Something I first learnt to do when I was in culinary school and we cooked a large Indian buffet.  However, I've since learnt this is a very traditional way to cook spices in Indian cooking.  This technique translates to other types of cuisine and dishes too, for example I toast my spices when making chili or a Bolognese sauce.

I like to puree the soup with an immersion blender which gives the finished soup a velvety smooth texture.  However, to add a little bite, I add some cooked Basmati or Jasmine rice just before serving. I wouldn't recommend adding raw rice to cook in the soup, it tends to absorb too much liquid and cause the soup to over thicken.  If you didn't want to add rice to the soup, some vegetables or lentils would work great.  Of course, the soup served on it's own is really nice too.

Here's the recipe:

1 medium yellow onion chopped
2 large garlic cloves crushed or chopped
1 teaspoon of turmeric
1 teaspoon of  oregano
1 teaspoon of cumin
1/2 teaspoon of onion powder
1/2 teaspoon of garlic powder
1/4 teaspoon of ground ginger
Seeds from 2 pods of cardamom (discard the shells) or a 1/4 teaspoon of ground cardamom
Pinch of Cayenne Pepper, or to taste
1 butternut squash, peeled de-seeded and chopped
Chicken stock - enough to just submerge the squash
1 can of coconut milk
1/2 cup of cooked Jasmine or Basmati rice (optional)

Add chopped onion and garlic to a dutch oven or pot and saute on medium heat for a minute or two until starting to soften.  Add a pinch of salt and then start adding all the herbs and spices stirring often.  Let the spices cook and toast in the pan with the onions for about five minutes (continuing to stir) or until the mixture is fragrant and the onions and garlic are softened.


Add the chopped butternut squash and toss in the onion, garlic, spice mixture cooking until slightly softened.  Then add chicken stock to the pan; enough to cover the butternut squash.  Give the whole mixture a stir and then cover with a tight fitting lid and turn the heat down to low and let gently simmer away for 20 to 30 minutes or until the butternut squash is cooked through.

Using an immersion blender, puree the mixture until smooth ensuring there are no large chunks of butternut squash left.


Then stir in the whole can of coconut milk, which should be just enough additional liquid to give the soup the perfect texture.


However, if after adding the coconut milk your soup is still too thick, add some more chicken stock or water.  Taste to see if the soup needs salt or pepper and then add vegetables or lentils as desired.  If using rice, add a little bit of cooked rice to the middle of your soup bowl and then pour soup around the rice to make an attractive presentation.

Rice Recipe

1/2 cup of Jasmine or Basmati rice
1 cup of water or chicken stock
salt and pepper to taste

Add rice and liquid in a small saucepan and place on medium high heat.  Bring the mixture to a simmer while stirring often.  Cover with a tight fitting lid and turn heat down to lowest setting and leave for 15 minutes until rice is cooked through.  Season with salt and pepper and stir rice with a fork to make fluffy.

Bon Appetit!


Thursday, 11 December 2014

Raspberry Pecan Linzer Cookies


I love holiday baking at Christmas time and enjoy getting into the festive spirit.  Although, during the month of December it can be hard to find the time and energy to get much baking done.  However, my Raspberry Pecan Linzer cookies are worth making as they're truly delicious and look impressive on a holiday cookie platter. While they take a little effort to make and assemble (rolling out the dough and using cookie cutters to shape each cookie), I have some time saving tips to make the process easier.

If you aren't familiar with Linzer cookies, they're cookies sandwiched with jam or preserves and the cookie dough always contains nuts, usually ground almonds (I use pecans).  I like to toast the pecans before grinding them up to ensure the pecan flavour really comes through in the finished cookie.  Not to mention, they add a subtle savoury element which offsets the sweetness of the raspberry jam.

To simplify things a little, I find that making the cookie dough ahead of time and storing it in the fridge is a good idea.  Since the dough takes all of 10 minutes to make, I do this a few days before I want to actually bake the cookies, that way the dough is all ready to go and makes things seem and feel easier on the day of baking.  Additionally, once you've rolled out the dough and shaped all the cookies, you could store your cookie trays in the fridge or freezer for a day or two before baking.  At which time, all you'd need to do is pop the trays in the oven and assemble the cookies.

While I love to make and can my own jam in the summer time, using a store bought jam to sandwich between the cookies makes life a lot easier.  I recommend using raspberry jam, but blackberry, blueberry, currant, strawberry or any other flavour of jam would work just fine too.  If you want to try making your own preserves, I've included my recipe for cardamom raspberry jam below. However, I'd recommend using frozen raspberries this time of year because the imported fresh berries can be a little pricey and less flavourful.

Here's the cookie dough recipe:

1/2 cup of pecans, toasted in the oven and crushed
1/2 cup unsalted butter at room temperature
zest of 1/2 a lemon
3/4 cup + 2 tablespoons of sugar
1 egg yolk
1 teaspoon of vanilla
1 cup of all purpose flour sifted
1/4 teaspoon of cinnamon
1/4 teaspoon of salt
Icing sugar to dust on the tops of each cookie
Raspberry jam for sandwiching between the cookies

Preheat oven to 350 degrees F and line three baking sheets with parchment paper.  On one of the cookies sheets add the pecans and toast in the oven for 5 to 10 minutes while making the cookie dough.  Let the toasted pecans sit for a few minutes to cool before crushing.  Using a mortar and pestle, grind the pecans into a coarse meal.  Alternatively, you could grind the toasted pecans in a food processor or place the nuts in a large Ziploc bag and bash with a rolling pin until nicely ground up.  However, if you use a food processor, you may need to add a teaspoon of icing sugar to prevent the nuts from grinding up into a paste.

In a medium or large mixing bowl, add the butter, lemon zest, sugar and beat until incorporated. Then add the egg yolk and vanilla and mix again.  Sift the flour cinnamon and salt into the butter mixture and mix until the dough comes together.  Wrap the dough in plastic wrap and refrigerate for at least two hours or to use at a later time.

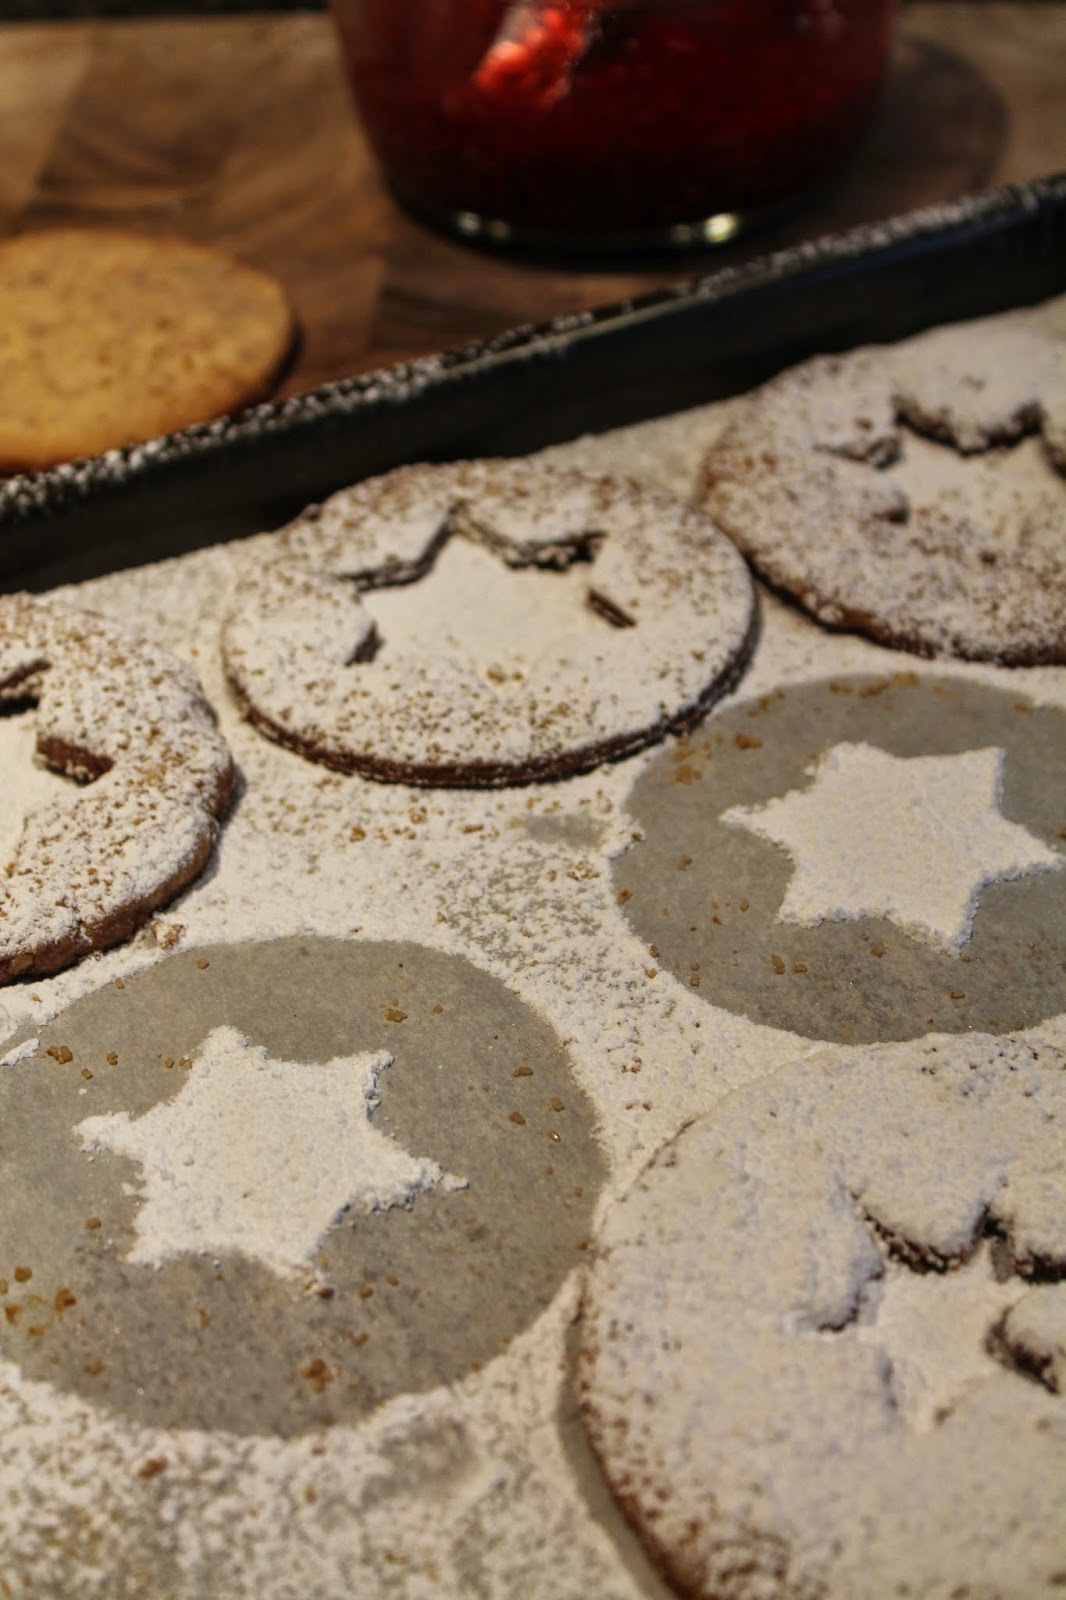
Un-wrap the cookie dough and cut in half.  On a heavily floured work surface, roll out the first half of dough to a 1/4 inch thickness.  Using a round cookie cutter, shape out each bottom of sandwich cookies and place on the baking tray (I use a thin metal spatula for transferring to the tray to prevent breaking or tearing the un-baked cookies).  Then do the same with the other half of dough, with the exception of using a smaller cookie cutter to cut out a star shape from the top cookie.  This gives the cookies a nice decorative finish and allows the jam to be visible.  All in all, I usually get about 10 finished cookies out the the dough, but as long as you have matching pairs of tops and bottoms it doesn't really matter how many cookies you end up with.  Place the cookie trays in the fridge for a hour before baking (or the freezer for 30 minutes) to ensure the cookies keep their shape while baking in the oven.

Bake in a 350 F oven for 8 to 10 minutes or until golden brown.  Let the cookies cool on the tray before assembling.  Dust the cooled top cookies with some icing sugar while still on the tray.  Then smother raspberry jam on the bottom of each cookie before placing the top cookie onto it.


Cardamom Raspberry Jam recipe:

1.2 kg or 2 pounds of fresh or frozen raspberries
4 cups of granulate sugar
zest of 1 lemon
1 cup of fresh lemon juice
2 teaspoons of ground cardamon
pinch of salt

Place all the ingredients in a large saucepan and let simmer away for about 1 hour, stirring occasionally.  Once the mixture has darkened, reduced and thickened a little, decant to sterilised jam jars or freezer jam jars.  The jam can be directly stored in the fridge for about 1 month or process the jam jars in a boiling water canner if you want to store in your pantry for a later use.  However, I recommend checking out a site such as the one I've attached below for more information about safely processing and canning jam.  http://www.bernardin.ca/pages/step_by_step___your_guide_to_home_canning/32.php  

Happy Holidays & Bon appetit!


Friday, 5 December 2014

Colourful white chocolate shortbread cookies.


On my list of Christmas baking; shortbread cookies are one of my absolute favourite.  I cannot imagine Christmas without the buttery richness and slightly sandy texture shortbread offers.  When I was growing up, my mom would make lovely whipped shortbread cookies always topped with a candied red or green cherry.  I remember nibbling away at the outside of the cookie until I had nothing left but the cherry which I refused to eat!

My version of shortbread is very different - slightly denser in texture and no cherries in sight.  Instead, I like to dip each cookie in colourful sanding sugar and fill with a small square of white chocolate before baking in the oven.  Using sanding sugar in a variety of festive colours make the cookies look irresistibly beautiful and impressive.  The addition of white chocolate is pleasantly surprising and adds a nice boost of vanilla flavour without being over-powering.  I recommend buying a good quality white chocolate for this recipe, and would not advise using white chocolate chips.  I love white chocolate, but lesser quality varieties have a strange after taste that I just can't get past.  If you don't like white chocolate, you could certainly leave it out or substitute with another type of chocolate.  However, I've tried making this recipe with dark or milk chocolate and found it completely over-powered the shortbread flavour.


Here's my recipe:

1 1/4 cup unsalted butter at room temperature
1/3 cup icing sugar
1/4 cup corn starch
1 1/2 cups all purpose flour
1/2 teaspoon salt
1 teaspoon vanilla extract
2 bars of good quality white chocolate, broken or cut into squares.  I use Lindt chocolate http://www.lindt.ca/swf/eng/products/bars/white-chocolate/.

Preheat oven to 350 F and line a couple of cookie sheets with parchment paper.

In a medium mixing bowl, add the butter and stir a bit before incorporating the icing sugar (this helps prevent the icing sugar from going everywhere when you start stirring it with the butter.  Then sift the icing sugar over the butter and mix to combine.  Sift in the corn starch, all purpose flour and mix slightly.  Then add the salt and vanilla and continue to stir until the dough comes together with no bits of flour left at the bottom of the bowl.  The dough should be pliable and have the consistency of very soft pie crust dough.

Pull off a generous tablespoon of dough and roll into a ball,  Press one square of white chocolate into the ball of cookie dough and roll again between your palms to ensure the chocolate is encapsulated in the dough.  Dip the ball into decorative sanding sugar (whatever colour(s) you like).  Place on a baking sheet and repeat with the remaining dough spacing each cookie about 2 inches apart, ending up with about 2 dozen.


Bake for 10 to 15 minutes or until the cookies are slightly golden around the edges.  Let cool on the cookie sheet before moving the cookies to a tin or container.  They are quite delicate and will fall apart if handled when still warm.

Merry Christmas!


Saturday, 29 November 2014

Best Chocolate Chip Cookies!


I feel quite often in life, simple pleasures are the most divine.  Chocolate chip cookies in my opinion embody such a statement perfectly.  Like so many of us, I have wonderful childhood memories of making chocolate chip cookies.  I can remember standing on a chair so I could "help" my Mom stir or pour ingredients into the bowl.  Thinking of those memories brings a smile to my face and makes me want to get in the kitchen and whip up a batch of cookies!

There's something so temptingly delicious about a well made (from scratch) chocolate chip cookie that's had me obsessed with finding the perfect recipe for years.  My mom sadly passed away a number of years ago and many of her recipes were committed to memory, leaving me to experiment trying to find the right fit.  What I'm looking for is a buttery, thin cookie that has a slight crunch on the edges and a chewy texture in the middle. I can honestly say that I've baked thousands of chocolate chip cookies over the years, this recipe is the closest I've come to my ideal cookie.

I find the ratio of butter to sugar and flour in this recipe results in the aforementioned thinness I prefer.  As well, the addition of toasted then crushed slivered almonds seems to intensify the chocolate flavour and adds a nice bit of crunch.  Sprinkling some Turbinado sugar on the top of each cookie before going in the oven adds a lovely caramel flavour and slight snap of crunch on the edges. I often use Turbinado sugar in baking for decoration or garnish because it doesn't tend to melt down as much as traditional granulated sugar does.  I've tried making these cookies without it and found the cookies came out softer, doughier and less chewy in the middle than I would like.  However, if you like a somewhat soft chocolate chip cookie, or can't find Turbinado sugar, feel free to leave it off.  I've found that most grocery stores now carry this type of sugar (sometimes labelled as "raw" sugar) but if it's not available where you live, you could use some regular white granulated sugar instead.


One thing I like to do is make the full recipe, but only bake up a quarter or half of the dough I've made. I then wrap the remaining dough in plastic cling film and store in the fridge for up to a one week or in the freezer for up to 6 months.  This way, I always have the wherewithal to whip up a delicious batch of chocolate chip cookies should the need (or craving) arise.


Here's the recipe:

4.5 ounces (about 1/2 cup) of unsalted butter at room temperature
1 cup brown sugar
1 egg
1 teaspoon vanilla
1 cup all purpose flour
1/4 teaspoon baking powder
1/4 teaspoon baking soda
Pinch of salt
1/2 cup almond slivers toasted and roughly ground (I do this in a mortar and pestle)
1 1/2 cups of chocolate chips (I like a mixture of semi sweet and milk chocolate)
2 to 3 tablespoons of turbinado sugar (http://wholesomesweeteners.com/Products/product-detail/PId/5/Organic-Turbinado)

Preheat your oven to 350 F and line a couple of cookie sheets with parchment paper.  Sprinkle the almonds onto one of the prepared cookie sheets and toast in the oven until golden and fragrant (you can do this while you make the cookie dough).  Then grind up to a coarse meal in a mortar and pestle, set aside.

Combine the butter and brown sugar in a mixing bowl and using a spatula mix well until completely incorporated.  Then add in the egg and vanilla and beat until combined.

Mix in the flour, baking powder and baking soda, and salt then followed by the almonds and chocolate chips.

Drop tablespoons of the dough on the cookie sheets and using your fingers or the palm of your hand, flatten the dough onto the sheet.  This will help the cookies bake up nice and thin with a slightly crispy edge and a chewy texture in the middle.  If you prefer a taller cookie with a doughy texture than skip this step and leave the dough in mounds.


Sprinkle each unbaked cookie with some turbinado sugar to add a slight crunch and caramelization. Bake in the oven for 8 to 10 minutes or until each cookie is golden brown.


Bon Appetit!

Wednesday, 26 November 2014

Coq au Riesling


I recently posted a recipe for Bouef Bourguignon that I love to cook on cold winter days.  I think it's really great to have a good arsenal of cold-weather recipes to bring out this time of year. However, as most of us have a rotation of recipes we rely on, the time inevitably comes you start to tire of slow cooked, beef-heavy recipes and long for something a little brighter and quicker. My Coq au Vin recipe ticks all of these boxes for me, yet still gives the warmth and comfort I love while it cooks away on the stove filling the house with mouth watering aromas.

Most people are familiar with the traditional Coq au Vin recipe which braises chicken in wine (traditionally red).  While I like the classic version of this dish, I've given it a bit of a make-over by using white wine, mustard and finishing with cream.  My wine of choice is a nice dry Riesling which adds a wonderful depth of wine flavour without overpowering the other ingredients.  In the past, most Riesling I've come across here in Canada was often sweet and fruity making it a poor choice for savoury recipes. However, dry Riesling varietals are becoming more and more popular and readily accessible in most places.  Thus, I've started cooking a lot with this wine and find it very versatile and an overall great choice.  Of course, you could use any dry white wine you like it doesn't have to be Riesling.

I prefer to cook this recipe in a shallow braiser, dutch oven or a skillet (with a lid) as opposed to a deep dutch oven.  This way, less of the chicken skin is submerged in the liquid preventing it from becoming loose and flabby.  As well, I find using a shallow braiser helps the sauce to reduce faster lowering the cooking time.  There are lots of reasons to make this recipe, but tops for me is that it doesn't take a particularly long time to cook, while still having the flavour of a slow roasted recipe.

The finished product has a creamy luscious quality that's balanced nicely by the tang of Dijon mustard.  It pairs beautifully with the same Riesling wine it was braised in and can be served alongside some lightly buttered noodles or steamed potatoes.  Overall, I think this zhooshed up version of Cog au Vin is a great recipe to brighten up the winter recipe repertoire.

Here's the recipe:

1 whole chicken broken down into 8 pieces (or 10 pieces if the breasts are quite large and you wish to cut them in half) or any individual chicken pieces of your choice
Salt and pepper to taste
2 tablespoons of butter or bacon grease
1 tablespoon of olive oil
1/2 pound of crimini mushrooms quartered (or cut into chunks)
1 medium yellow onion finely diced
2 cloves of garlic minced
1/4 to 1/2 cup of wine for deglazing
1 sprig of fresh Rosemary
3 to 4 sprigs of fresh Thyme
2 tablespoons of Dijon mustard
1 to 2 cups more wine, to simmer the chicken in
1 cup of whipping cream
1 tablespoon of butter
More salt and pepper to taste for finishing
Parsley roughly chopped for garnish

Break down the chicken by using a sharp thin bladed knife, such as a boning or fillet knife.  If you do not have either of these use a regular chef's knife in conjunction with a paring knife to get into the small areas.  Cut off both legs first, slicing between the joints to separate.  Then remove the wish bone (using the paring knife if you don't have a boning or fillet knife) to make removing the breasts much easier.  Then slice each breast off the bone trying to keep as close to the bone as possible to avoid leaving a lot of breast meat attached to the body.  Then cut around the thigh and slicing between the joints to remove.  Pat all the pieces down with some paper towel and season with salt and pepper.  If you're not comfortable breaking down a whole chicken, go ahead and use any chicken pieces you like, boneless skinless chicken thighs are usually available in most grocery stores and work well.  Whatever chicken meat you use, I would still advice patting it down with paper towel before seasoning.  This will help ensure the meat browns nicely when searing it later.

In the shallow braiser or pan, heat the butter and oil (or bacon grease) until melted.  Add a few pieces of the chicken to the pan searing on all sides until browned all over.  Depending on the size of your pan, this may need to be done in two batches to avoid crowding.  Otherwise the chicken will steam instead of searing, which results in flabby chicken skin.  I want the chicken to be golden brown and the skin crispy to develop a lot of flavour in short amount of time.  Once all the chicken pieces are nicely seared and crisp, remove to a plate or bowl and set aside.

Add the chopped mushrooms to the pan and saute on medium high heat, until they are golden brown at which time add the onions, garlic, herbs, a pinch of salt and lower the heat down to medium low.  Let the mushroom and onion mixture cook until the onion and garlic has softened.  Then deglaze the pan with some of the white wine and stir to bring up any browned bits from the bottom of the pan. Continue to cook on medium to medium low heat until the wine has reduced a little.


Then add the Dijon mustard and stir into the mixture and add the chicken back into the pan.  Pour more wine into the pan until the liquid comes halfway up the chicken pieces.


Cover with a lid, slightly ajar to release steam and let simmer on low heat for 30 to 40 minutes or until the chicken is completely cooked through and the sauce is thickened slightly.


Pour the cream into the pan, trying to avoid pouring directly over the chicken pieces (so the crispy skin doesn't soften) and continue to simmer with the lid off until the sauce is nicely thick. Add the butter to finish and add glossiness to the sauce and sprinkle with the parsley.  Serve, eat and enjoy!

Bon appetit!


Tuesday, 4 November 2014

Bouef Bourguignon my way.


This time of year, when the weather is cool and rainy (in my part of the world at least), I'm drawn to food that is warm and comforting.  Subsequently, recipes which fall into the category of stews, soups and braises are what I'm itching to make.  After a summer of avoiding the use of my oven (in an effort to keep my house cool), I can't wait to start using it regularly again and enjoying the gentle warmth it adds to my home.

Bouef Bourguigon is beef stew cooked in wine from the Burgundy region of France. There are many variations of this recipe, but most of the time the beef is braised in the aforementioned wine with garlic, pearl onions, herbs, and mushrooms.  It's usually served on top or alongside a starch of some sort like buttered noodles or steamed potatoes.

My version is slightly different by which I use regular cooking onion (since I couldn't find any pearl onions), carrots, celery, herbs, bacon and finally leaving out the mushrooms.  I added in carrots because I quite like the balance and slight sweetness they add and while I often add mushrooms to this recipe, I prefer this dish cooked without them.  I find in order for the mushrooms to have the right texture in the stew, I have to saute them separately and add them in at the end.  Since the mushroom flavour won't make or break the stew (for my palette), I left them out.  Also, my decision to add bacon is not very traditional, but the subtle smoky and salty quality it adds is quite pleasant. I like to serve this with lightly buttered cavatapi noodles; they're definitely not a traditional accompaniment, but my family loves them so I always have a supply on hand.  However, you could certainly choose a different pasta of your liking, or some potatoes and failing that; nothing at all, just the lovely stew.

In my opinion, this recipe can be made with any full bodied red wine that appeals to you.  It's not absolutely imperative the wine come from Burgundy or even from France for that matter.  I used a nice, full flavoured and reasonably priced red wine from the Okanagan to cook the beef in.  I wouldn't recommend using an expensive wine for this recipe, since the stew will braise for a few hours and the wines flavour will end up much less pronounced.

Recipe:

2 lbs of beef stewing meet, I used chuck
3/4 cup of all purpose flour
1 tsp salt
Few pinches of freshly ground pepper
2 tablespoons olive oil
1 cup of red wine (plus some more for later to top up stew)
4 strips of bacon chopped
2 carrots chopped into batons or a rough dice
2 or three ribs of celery coarsely chopped
1 medium yellow or red onion coarsely chopped
2 cloves of garlic finely grated or chopped
2 tablespoons of tomato paste
2 or three sprigs of fresh rosemary and thyme
1 cup of beef or chicken stock


Preheat your oven to 275 F, pour the flour and salt into a shallow dish and add a dash of freshly ground pepper.

Pat the beef stewing meat dry with a piece of paper towel and heat a large dutch oven or pot on medium high heat.  In batches, dredge the beef in the flour, and then saute in olive oil turning the beef as it sears to brown on all sides.  While sauteing the beef, ensure that your pot doesn't get too hot causing the bits (that stick the bottom) to burn.  Remove the seared beef to a bowl and set aside, leaving your pot on the heat.

Deglaze the pot with the cup of red wine; making sure to stir and lift up all the bits of beef left at the bottom of the pan.  Allow to gently simmer for a minute or so, letting the wine reduce slightly. Then pour the wine into the dish with the beef, set aside while you continue.

To the same pan still on medium heat, add the chopped bacon and saute until the fat is rendered and the bacon is browned.  Remove the bacon to a paper towel to drain and set aside (leaving any bacon fat in the pan).  Add the carrots, celery, onion and garlic to the pan and saute in the bacon fat until softened.  Add the tomato paste to the vegetables stirring until the paste has combined and spread around in the vegetable mixture.  Then add the beef and bacon back into the pot; add in the herbs and top up with beef stock as well as some more wine.

Put a lid on the dutch oven or pot, leaving it a little ajar to let steam out.  Place the pot in the oven and check on the stew every 45 minutes or so to ensure the sauce isn't over-reducing (if it is, turn down the oven by 25 degrees).  Leave the stew to braise for 3 hours or until the meat is meltingly tender and the sauce is nicely thickened and glossy. Serve and enjoy!

Bon appetit!